5 Steps to Create a Sun Goddess
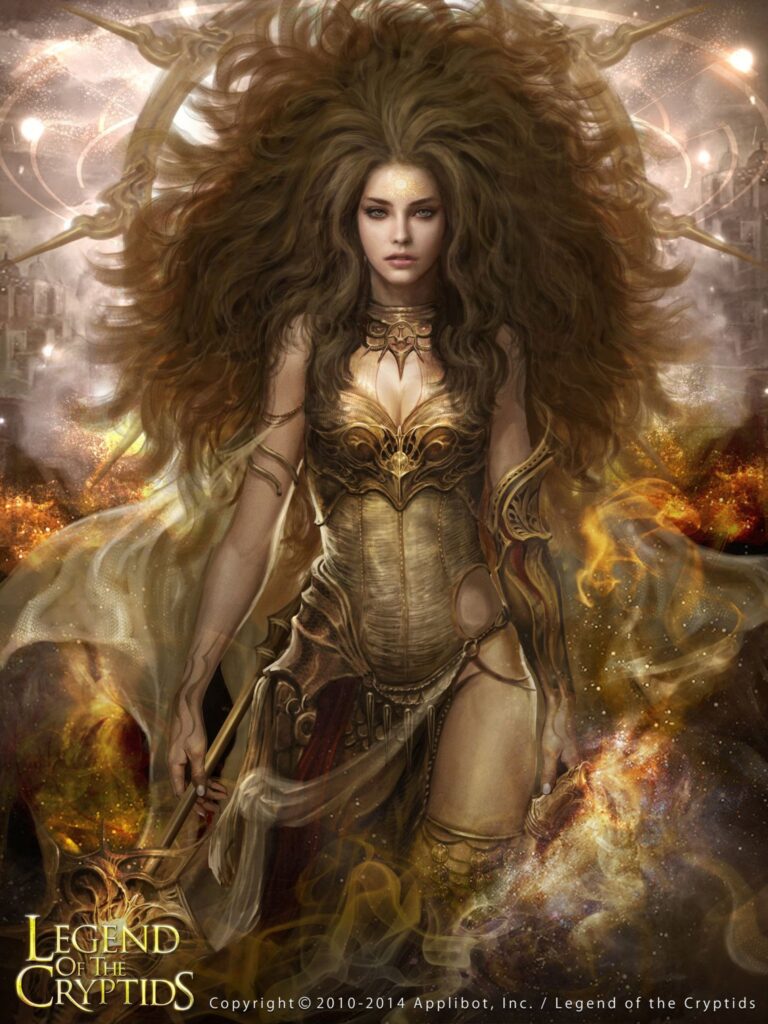
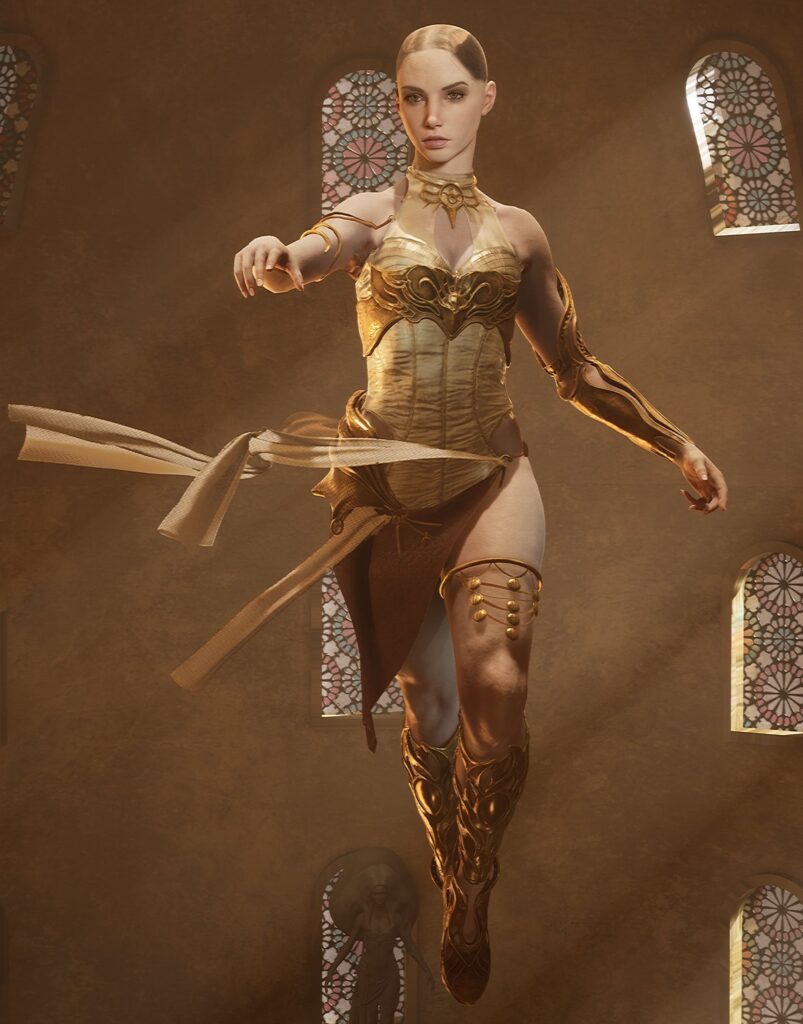
Artist Bailey Wheatland, inspired by an illustration by Shin Tae Sub for Legend of the Cryptids, dedicated three and a half months to bringing his Amasol character out of fantasy 2d and into 3d realism. From anatomy basics to a tedious workflow for floating hair, Bailey created a stunning 3d character. Read on for the technical details of his process:
- Sculpt of the Body: Getting the Figure Right
- Facial Features: Finding Asymmetry
- Working on Hair: Achieving Lightness
- Texturing & Colors: Sticking to Simple
- Corset Material: Inspired by Hobby Lobby
- Presentation: VFX, Animation, Lighting
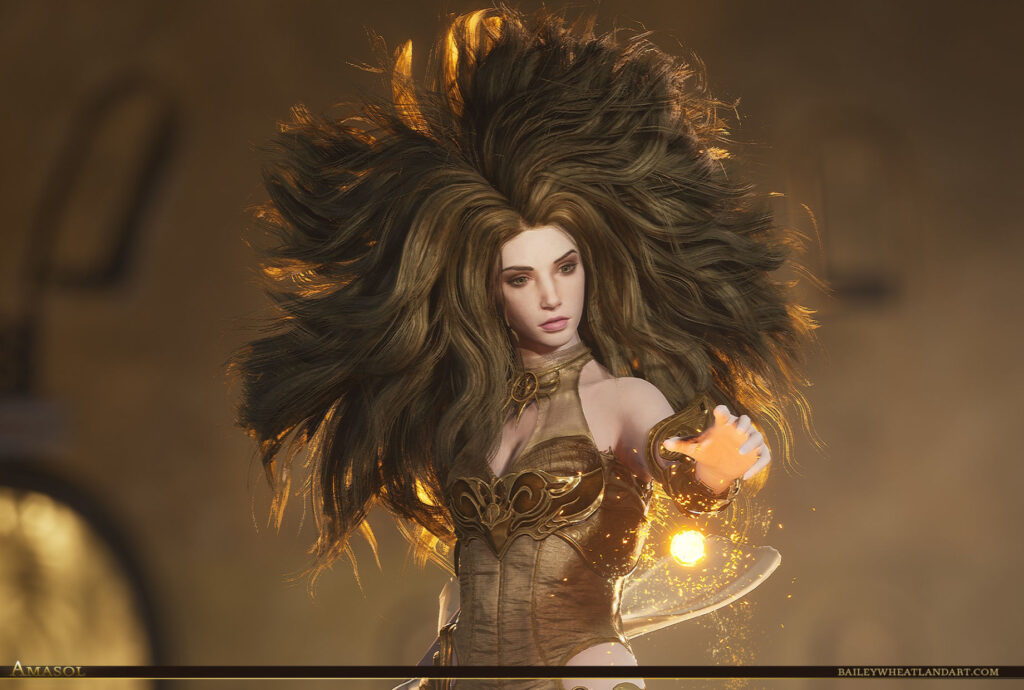
Background
Hello, my name is Bailey Wheatland. I am a character artist and a recent graduate from the Savannah College of Art and Design (SCAD). For as long as I can remember I have always been referred to as the “art kid”. I would make my own comics, create new dinosaurs, and write short stories just to keep training up my creative muscles. This journey into 3D art began around the time I was 13 when I learned Blender. I realized early on that my main interest was in creating characters and creatures.
Amasol: Start of the Project
I originally selected this character for Adam Skutt’s class Next Gen Character Creation. The goal of the class was to create a realistic human for a real-time environment. This was our only guideline in the class so I came up with a few self-imposed guidelines of my own.
- First, I wanted to create a female character since my portfolio lacked that area of character art.
- Second, I wanted to create a character with intricate hard surface elements to contrast the innate organic nature of the human figure.
- My final requirement for the project was to create a character that was simply beautiful.
I spent 2-3 days searching for a character concept. When I came across an astounding piece by Shin Tae Sub for Legend of the Cryptids, I knew this was the character I wanted to tackle for the class. Since the class focused on realism, I planned to change a few things in the concept to draw the character out of fantasy and into reality.
1. Sculpt of the Body: Getting the Figure Right
Before I started this project, I was working on another character project of mine that featured Mediterranean figures. The topology was already good to go, so I used that base mesh for Amasol.
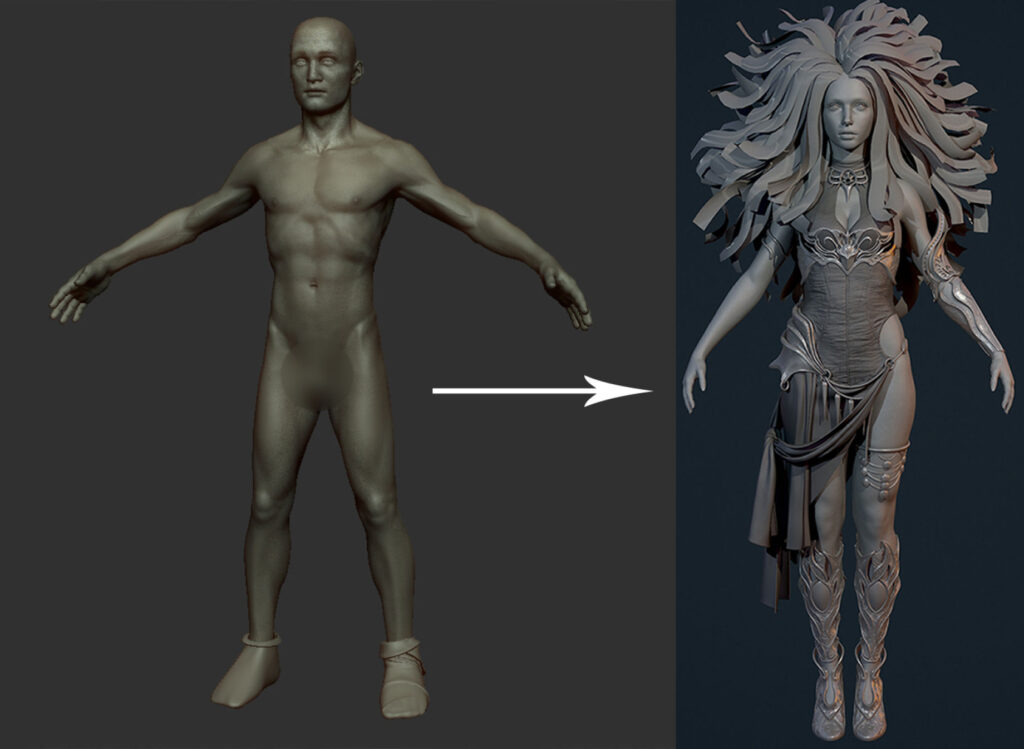
Over the entire project, I also looked at many reference images of women. 3d.sk was an excellent website for it, plus Pinterest helped with general anatomy breakdowns. Another great reference I had was 3D scan data of a female model. I took an anatomy class a year ago and got a bunch of scans of the same model in different poses. It was so beneficial to see how those forms looked in ZBrush with the same material as my model. This helped to move from 2d to 3d in many ways. For example, in the illustration, her legs were too long if you drew beyond the image. I quickly found out that there was a trope of fantastical female characters having incredibly long legs. In 3D these legs made the character seem disproportionate rather than elegant. Wanting to extend the legs through realistic means, I decided to put her in heels. In this way, I am paying homage to the fantasy proportions of the original work while putting a more realistic spin on it.
Earn a deeper understanding of human form in CGMA's course Anatomy for Production
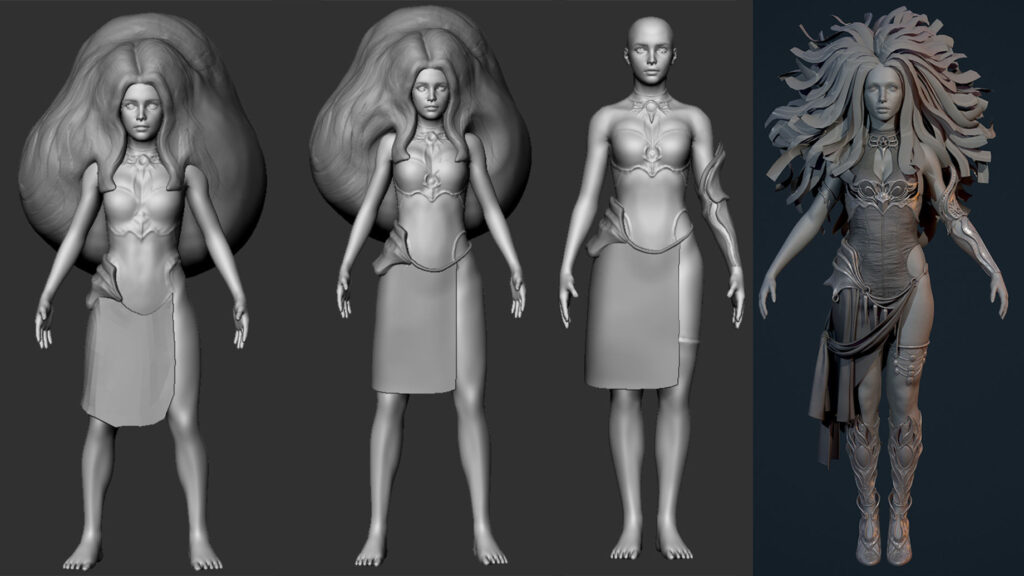
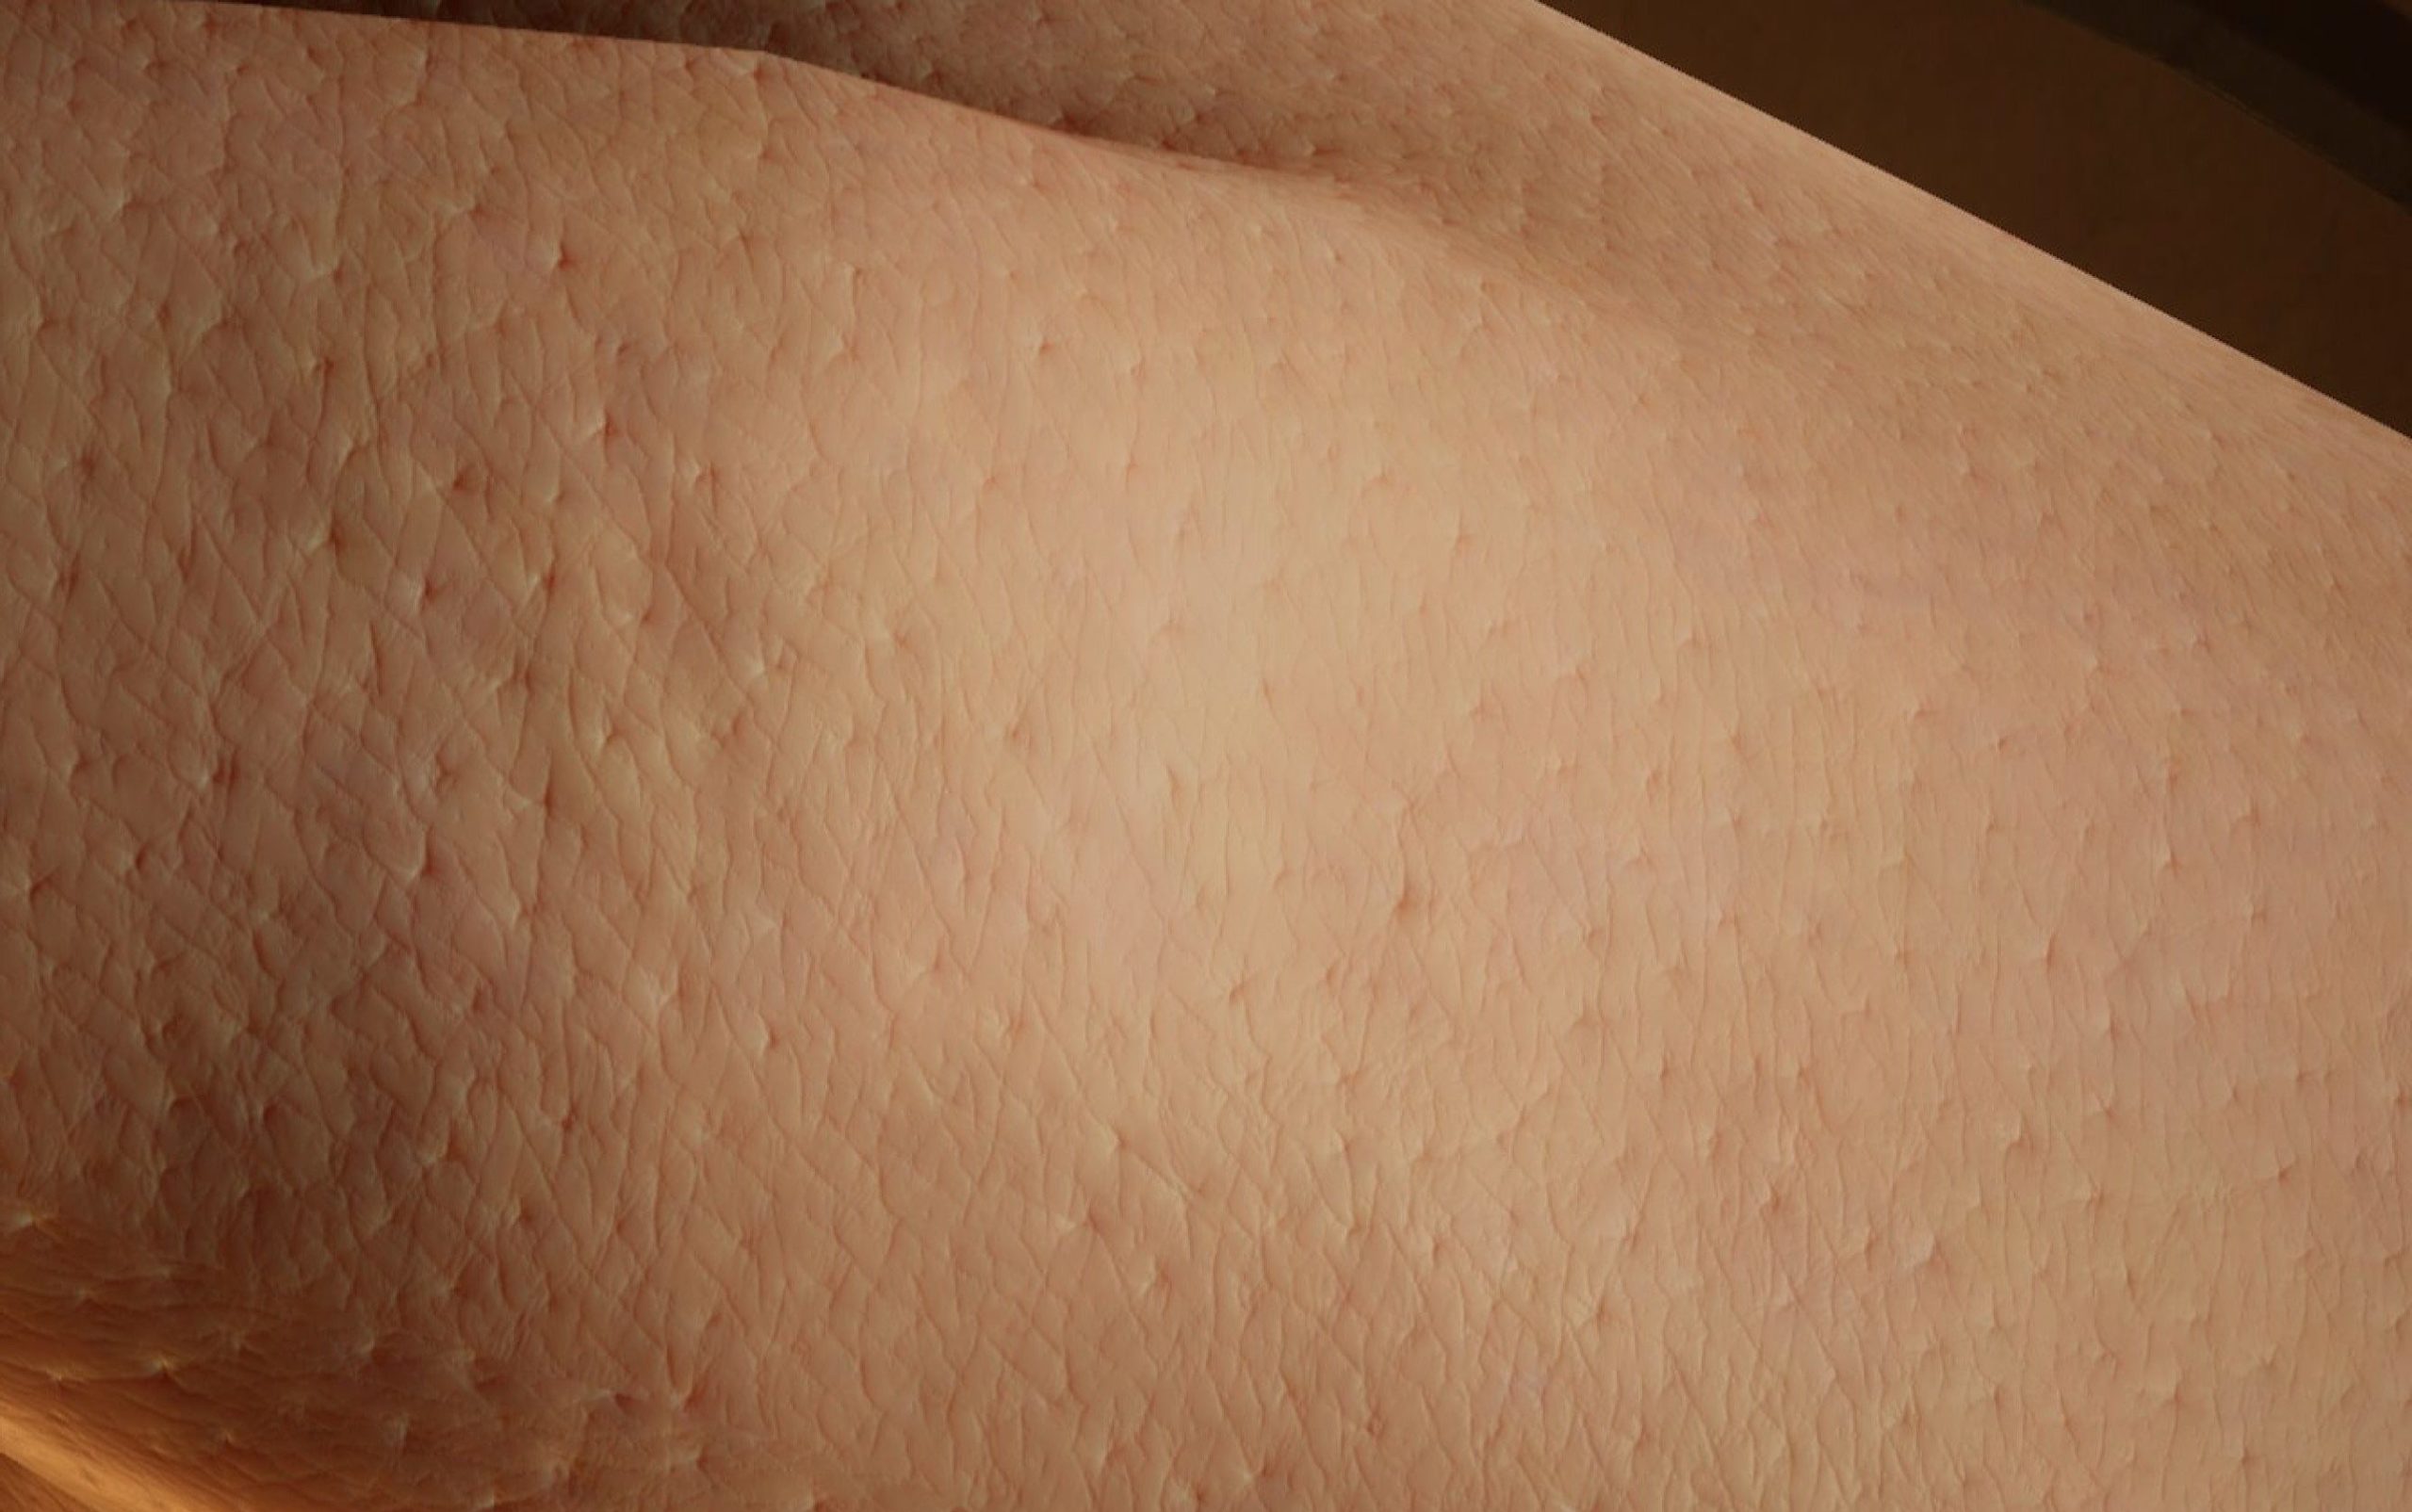
To push the character into realism, I tried to make the anatomy more organic. The primary forms looked lifeless due to a lack of fluid lines in the structure. Once you lay down your initial primary forms, you should give them a little bit more character by randomizing some of those neat straight lines to create a more dynamic figure. Another personal trick that helps me is getting to the skin detail a bit earlier in the process once my primaries and secondaries have been established.

For this project, I used a combination of projecting TexturingXYZ textures with Mari and employing noise passes, alphas, and hand sculpting in ZBrush to create the skin texture. I used a combination of the Inflate brush set to an intensity of 5, the Standard brush set to 10, and the Clay Build Up brush with no alpha set to a 6 to create a very organic result due to the build-up of subtle form creating a surface that reads as flesh and not as rigid forms.
Once the game resolution model is in the engine, I will further this detail by adding a micro normal map which can be tiled and really helps sell the illusion of skin for up close shots.
2. Facial Features: Finding Asymmetry
There were a few supermodels and actresses who fit this concept, so I put a reference sheet together that included the models Adrianna Lima, Ashley Greene, and Stella Maxwell.
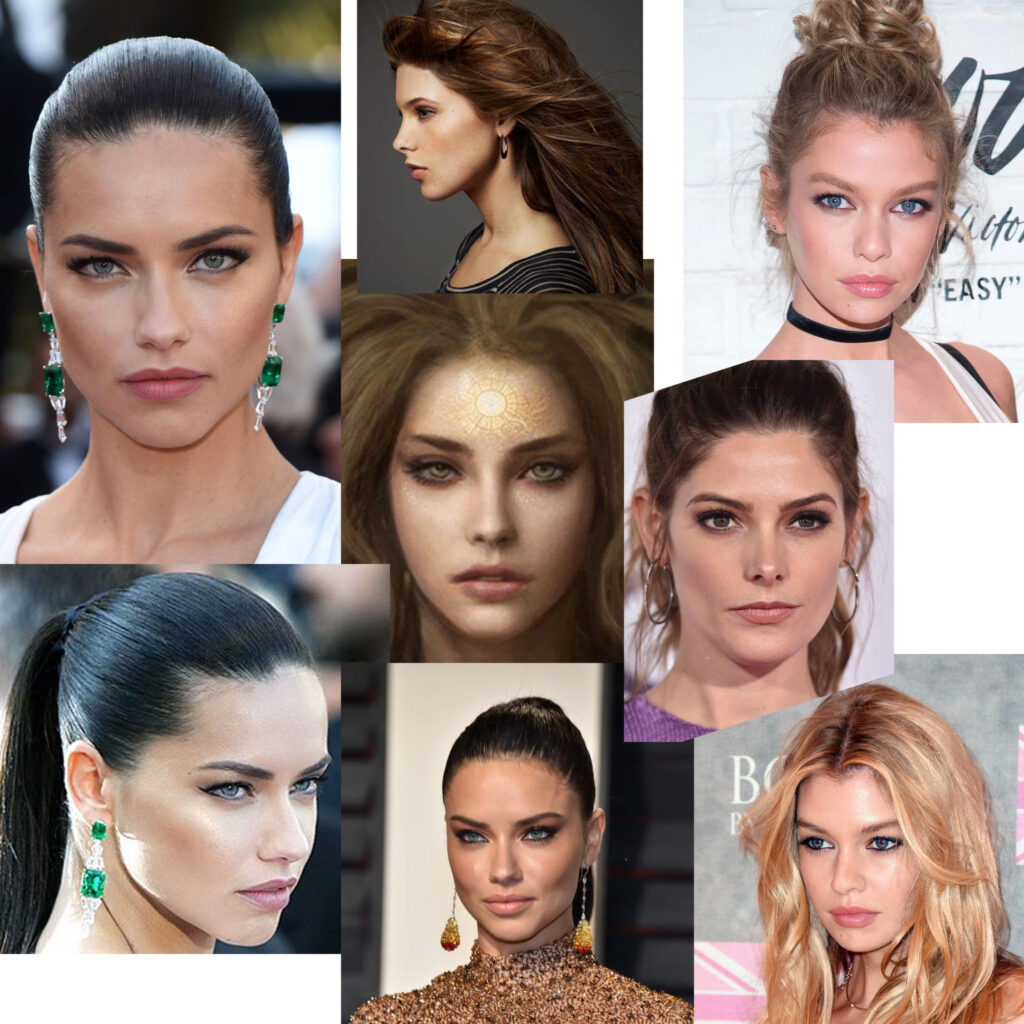
Once I had my references, my approach to the head was very similar to the process I described with the body (see step 1). I imported the secondary, tertiary, and micro grayscale textures into ZBrush as displacement maps where I set each map to a different layer. This allowed me to get the right blend between the different levels of detail. I then continued to sculpt the head, placing additional form break up around the fattier areas and adding a bit more asymmetry to the face.
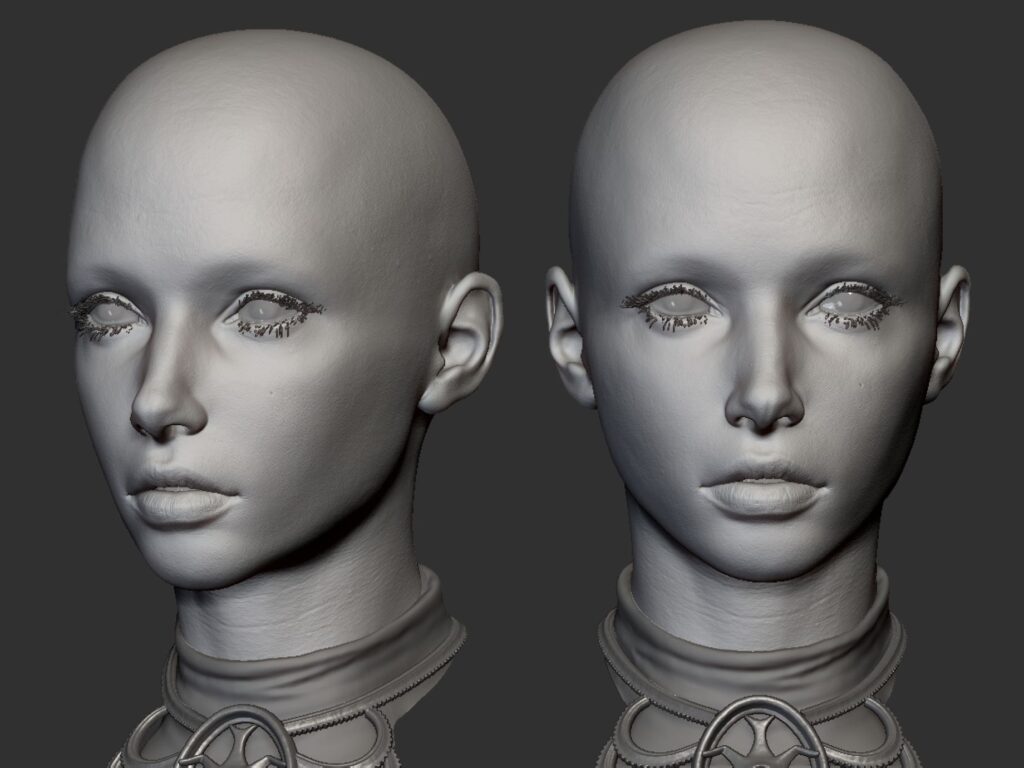
Once the face was done, I added peach fuzz to the sculpt with fibermesh in ZBrush. I then groomed it with the snake hook brush and zproject brush. Peach fuzz and body hair have specific flows that they abide by so grooming the hair in a specific way is pretty important.
I then baked the peach fuzz in a separate normal map along with vertex color that would act as a mask so I could then control the fuzz normal in either Photoshop or UE4.
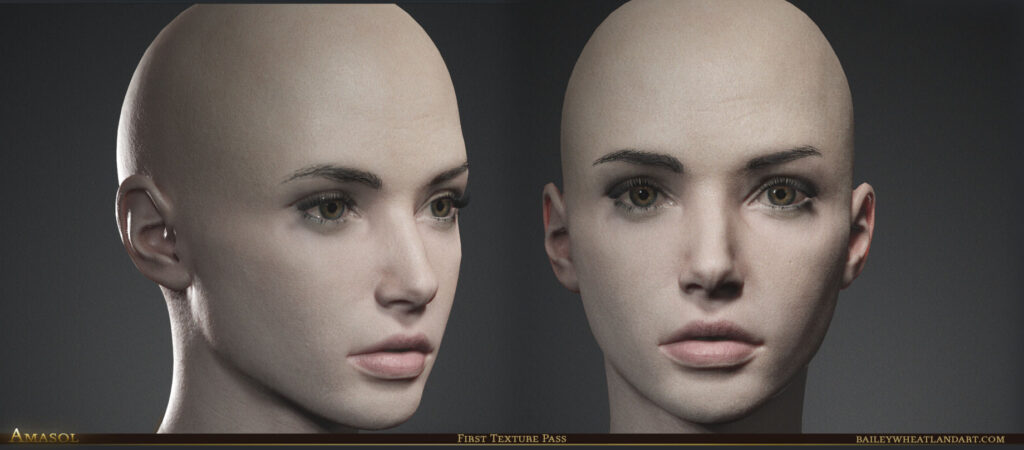
For the albedo map, I used Substance Painter and followed the method laid out by Magdalena Dadela. This method includes using a smart material as a base and then adding the different tonal zones to the face along with mottling and the other specifics to the skin. In addition to the methods discussed in the video, I also added a peach fuzz layer to give the strands a bit of color in the albedo to fake the skin reflections that you would see on actual peach fuzz. The vertex color I baked off earlier acted as a mask for my fill layer in Substance Painter.
3. Working on Hair: Achieving Lightness
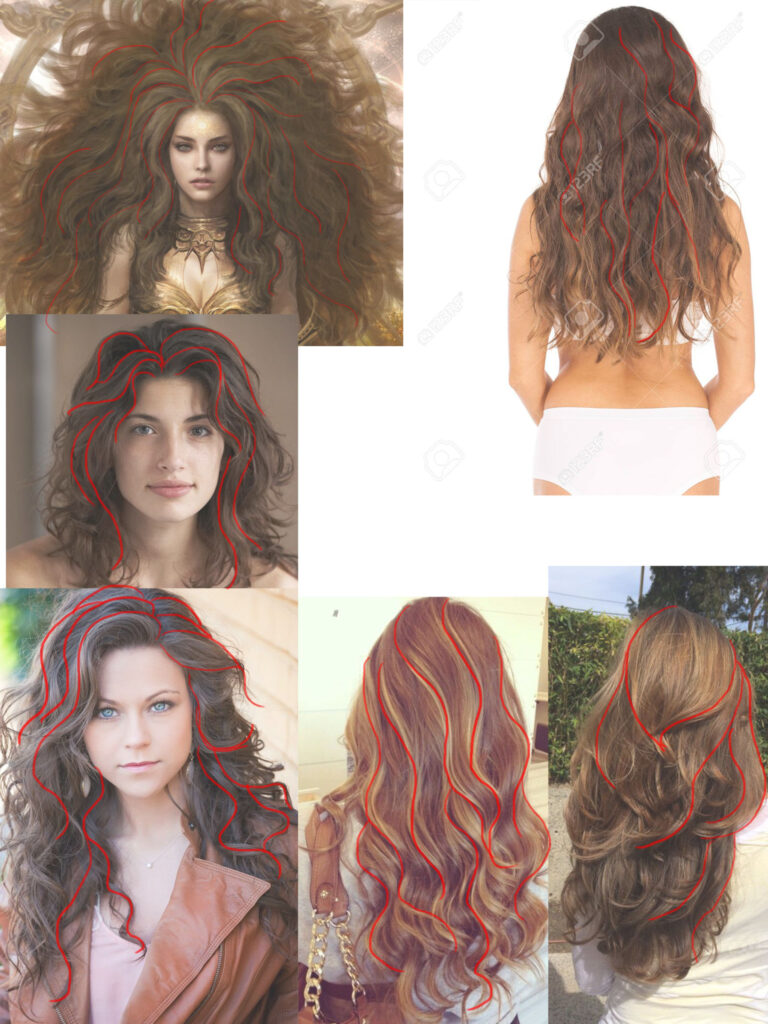
Before starting on the hair, I gathered some references for the flow of the hairstyle. A big challenge for this project was creating a wavy style along with posing it in an animated way to give it the sense of floating in the air.
The workflow I chose was a blend between Tom Parker’s approach and Adam Skutt’s approach. I originally created my own insert mesh brush divided into 3 segments in Blender. You have one part for the root, the middle part that can be continually repeated to add length, and then the ends. Once I got my curve brush set up in ZBrush with the mesh, it was just a matter of drawing each strand out and placing it by hand.
I had the idea of doing a simulation in Marvelous Designer with the hair strands at one point, but since my UVs aren’t useable in that program, there was no way I could pin the strands at the root to get a good simulation. So my other solution was to mask the roots in ZBrush and use some of the deform modifiers to help achieve that light quality to the hair. I quickly masked the roots by flattening the model with the UV master, box masking them, and then unflattening. For some reason, this only worked the one time and all other times I tried this the masking would always get lost between unflattening and flattening. Fortunately, I was able to just use the mask pen and mask the roots fairly well on the model without that additional step.
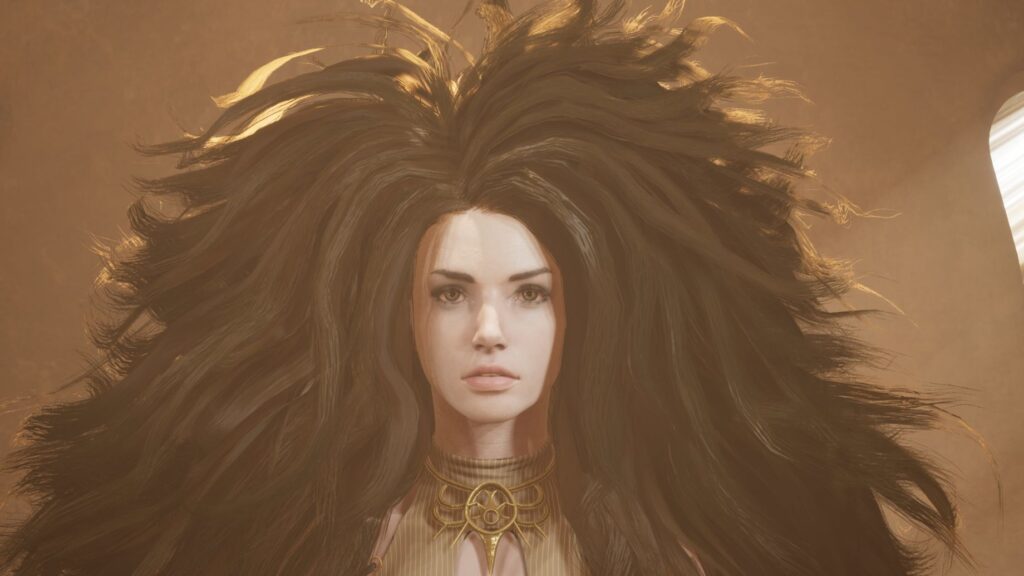
During this initial process of laying out the hair, I quickly drew a few texture strands for it just so I could get an idea of how much area I would be covering once the planes were textured.
I would then replace with hair textures generated with Xgen in Maya.
I only rendered out an alpha and Ambient Occlusion (AO) map for the hair. Unreal has a powerful hair shader that requires a few additional maps so I went ahead and made those for faster look development iteration. These textures included a root to tip, hair ID, and pixel density offset (PDO) maps. I was able to get away with just using constant vector 3 (CV3) nodes to create the hair color. This is essentially a node that just offers me any singular color I want, much like how you select colors in Photoshop. I was able to get color variations between each strand of hair as well as variety in the values of the hair. Two other textures I created came from altering the AO which was the normal and the flow maps. The flow map helped blend the planes together so they didn’t appear so segregated from one another. The normal map allowed me to add extra depth to the individual strands which helps a lot for close-up shots.
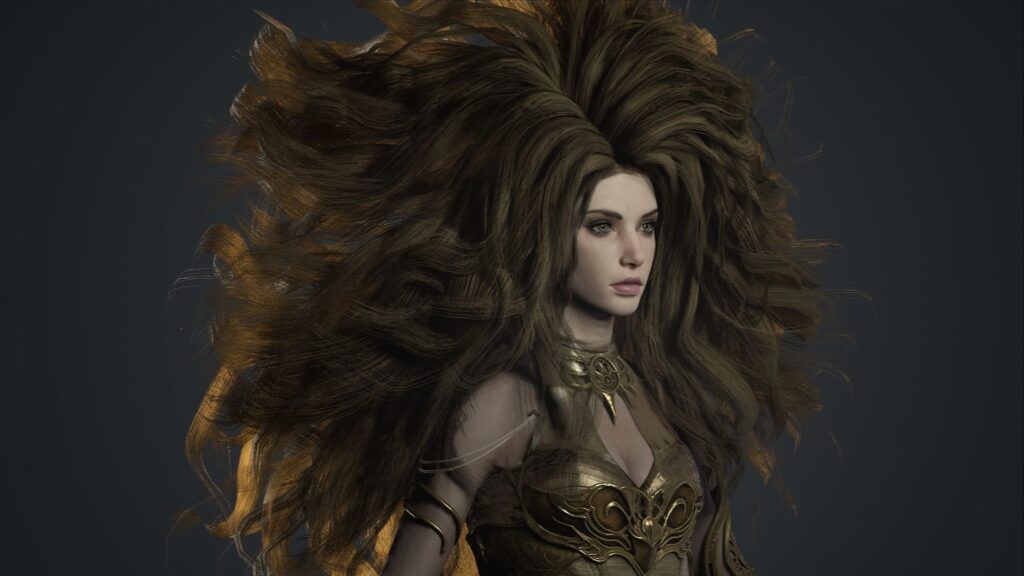
From then on it was just back and forth between ZBrush and Maya as I continued to shape and place the hair all while adjusting the UVs by hand for the further breakup between the layers of hair. I wish the process would have been a bit more streamlined, but I’m happy with the result I was able to achieve in a couple of weeks' time.
I was able to push Epic’s hair shader a bit more by changing the shading model from hair to subsurface profile. This allowed me to not only achieve a softer look to the hair but also to control the extinction scale of the effect which allowed some very nice light to pass through the strands in combination with the PDO map.
See how Character Artist Calvin Verhoolen approaches hair building in his breakdown "How to Create Game Character Hair: Medieval Braid"
4. Texturing & Colors: Sticking to Simple
The textures for the clothing were very simple. The entire process took me around 20 minutes from start to finish in Substance Painter. With this project, I actually did shader work before texture work which was an absolute reversal of how I normally approach character art. If this were in Marmoset I would have done textures first, but there is so much more you can do with the material editor in UE4.
I did most of my legwork with the sculpt already so when it came time to texture, I used a combination of texture bakes as masks in Substance Painter. I had curvature, AO, cavity, and world position maps for the metal parts of the outfit. By using one of the metal smart materials and a little bit of tweaking and hand painting, I was able to get a good result in a very short amount of time.
I normally multiply the base texture with a flat color (CV3 node) in UE4 so when I made a material instance from the master material, I could then alter the color instantly to match the colors in the concept more effectively.
Learn how to optimize your scene's lighting to highlight color and textures in CGMA course Lighting and Shading for Film Production
5. Corset Material: Inspired by Hobby Lobby
The corset is the material I’m most proud of. This was the most complex material I put together on the project, and while it took some tweaking, it came out better than I had envisioned. I knew the general approach to get the material done and that’s why I wanted to have my final character done in UE4 and not Marmoset. You can create beautiful images in both, but the flexibility of the material editor in UE4 is what made this solution a no-brainer to me.
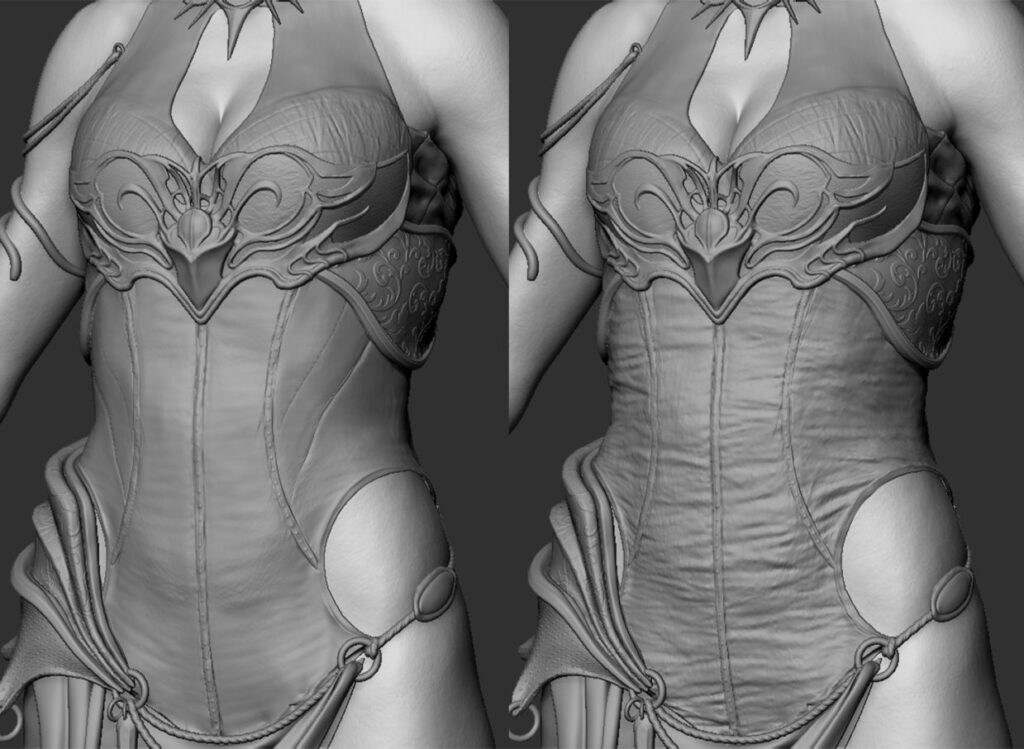
The goal of the corset was to make it a two-layered material. It would feature a cotton twill material at its base and a silk sheer material on the top. I chose to use the clear coat shader as a starting point for the material since it utilizes 2 normal and 2 roughness map slots.
I knew I was going to utilize two normal maps, so I considered that when creating the high poly version of the corset. I started by creating the base in Marvelous Designer and referenced a sewing pattern of a corset I had found online. Once I got the base done I then brought it into ZBrush to further refine it. After the base sculpt was finished I then sculpted the sheer material on another layer. This allowed me to toggle that sheer structure on and off so when I got to baking the textures, I could easily export two different high poly versions of the corset.
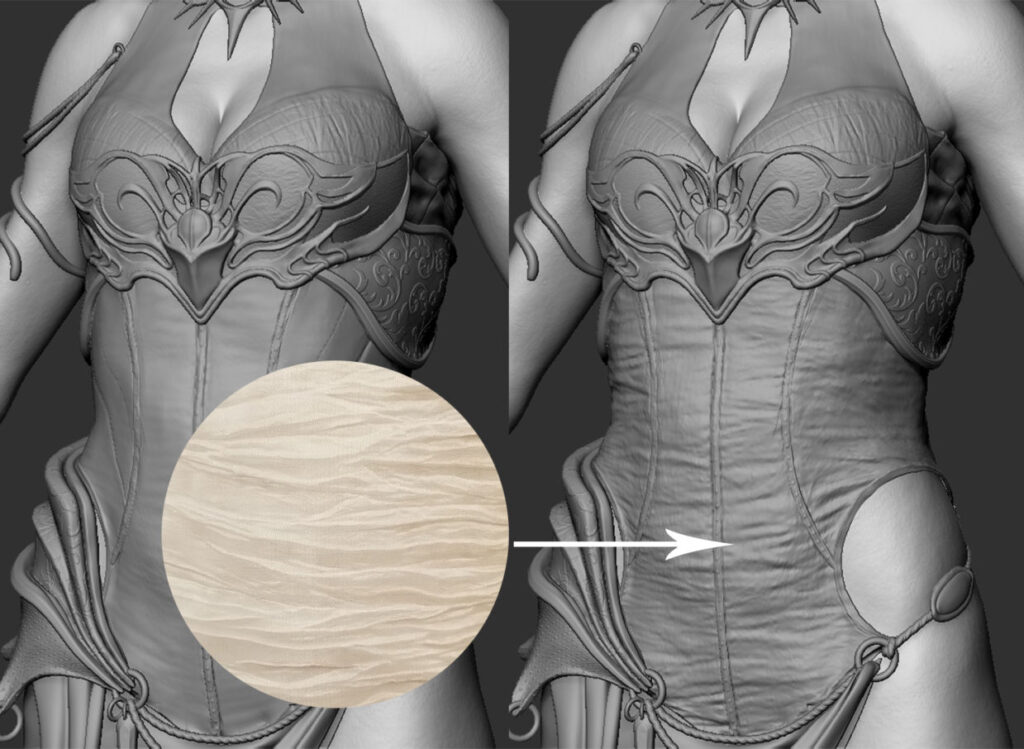
The sheer texture was taken from a picture I took at my local Hobby Lobby that had the exact structure I was looking for. I created an alpha texture from that image and that is what I used to begin constructing the top layer.
When making the shader for the corset, I had originally wanted to use the cloth shading model, but it didn’t offer the layered effect that I wanted. I noticed that one of the cloth-specific texture slots called fuzz replaced the emissive texture slot. So in the clear coat shading model, I treated the emissive slot like the fuzz and I was able to get the same effect seen in the cloth shader.
The biggest challenge in the material was to get the opacity fine-tuned in a way that allowed enough translucency on the border of the model as well as having some opacity shifts within those borders. Sheer is a very translucent material so it was paramount that I got the effect right. My solution for the effect involved using a combination of fresnel nodes for the opacity mask, emissives, and albedo. Most of this was driven by a thickness map I had baked out of Marmoset that contained the sheer corset high poly information.
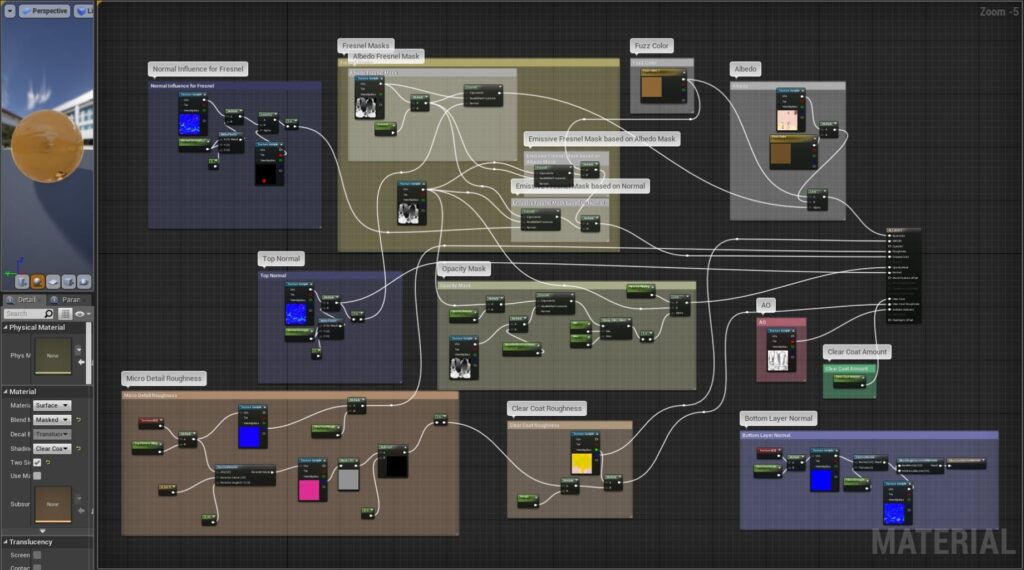
Once I had all my textures I started to plug them into my shader and, with material instances, I was able to tweak the values of the fresnel masks to my liking.
For the final image, I ended up redoing a good portion of lighting due to our previous map in UE4 crashing when trying to open it. Fortunately, this was after the quarter and after the final turn in for the video. I had duplicated the map, but in that version, the lighting needed to be rebuilt.
Final Thoughts
- Adam’s CGMA class was my one educational obligation this past summer so I committed to that class with my undivided attention. I didn’t learn much new information since I already had access to Adam’s course through recordings on Game Art Institute. I applied for the course primarily to get Adam’s feedback on my work. The course to me was kind of a giant test of my current knowledge and I used Adam’s feedback as a point of validation for said knowledge.
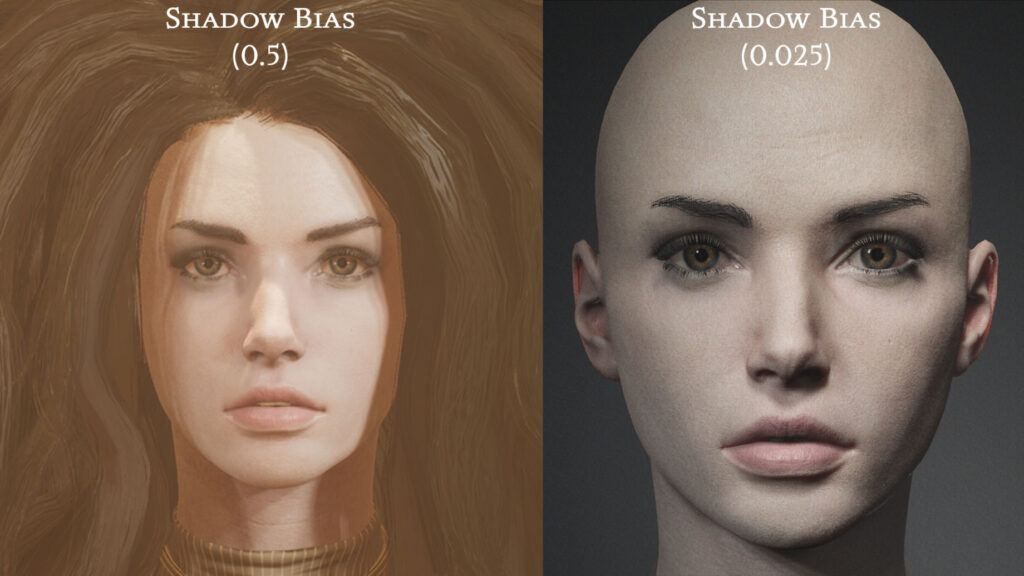
- In terms of lighting, there is a property in all UE4 lights types called shadow bias. The documentation on this says decreasing the value allows the object to feel more grounded with shadows. From my experiments, decreasing the shadow bias increases the number of shadows your geometry casts. If you notice in the digital human UE4 project the default shadow bias is set to a value of 0.025. This is extremely low and it allows for much more accurate cast shadows and aids so much to the realism of the figure. All default values for lights are normally set to 0.5. It should be noted that if this value is set too low you will give some shadow artifacts on your model if it isn’t that high in polycount. For instance, on the legs of my model, you would start to see the edges of the polys that composed the leg because the shadowing was too accurate to the surface. The head, being higher in polycount, was fine at lower values so there was a trade-off that needed to happen. A value of 0.065 seemed to be the perfect compromise for me. This value played a huge impact on realism for the character as well. I had two maps in UE4 that tested the shaders and textures on the character. I had a look development map, which was just a duplicate of the digital human map and then the Malta map which is where all the content for the video was. It was when I imported the model into the Malta map that I became aware of a disconnect in the lighting. As I said earlier, the default value of the lights is 0.5 vs. the 0.025 lights in the digital human map. The body looked fine, but the detail on the face was really blown out when compared to how it looked in the other mapI spent an entire day thinking that this was a smoothing groups issue. I reached out to Adam Skutt and he said it looked more like a shadow bias problem. Thankfully, this was the issue and not smoothing groups.
- The other lesson I learned came exclusively from CGMA. Most of the time in the class you are just sculpting the portrait. This caused concern for me because I didn’t know if I or anyone else in the class was going to finish our characters completely. The class is called “Next Gen Character Creation”, so the name implies that you will be making a whole character in 10 weeks time. As it turns out only two people have done this in Adam’s class during his entire time of teaching. This put to rest any nerves I had about not being fast enough.
- I was thankful we got a lot of time to finalize that sculpt and apparently, this was the norm in the class. Some portrait sculpts apparently can take up to 6 months in the industry according to a few people I have asked, so it didn’t seem unheard of to spend the majority of a 10-week class sculpting the head. Most of the mind-numbing sculpts and works I’m seeing nowadays have taken around 4 months to complete. These numbers are coming from the heads of the industry too, so even people of such a high skill level require the proper time to make amazing works of art.
RELATED LINKS
Earn a deeper understanding of human form in CGMA's course Anatomy for Production
See how Character Artist Calvin Verhoolen approaches hair building in his breakdown "How to Create Game Character Hair: Medieval Braid"
Learn how to optimize your scene's lighting to highlight color and textures in CGMA course Lighting and Shading for Film Production
LEARN MORE
CGMA provides comprehensive instruction for Art, Games, and VFX industries in a variety of courses for a range of students, from 2D and 3D artists looking to supplement their college studies to industry professionals looking to stay up to date on emerging trends and techniques in the field.


