Intro to Character Creation for Cinematics
Kamal Eldin, talked about his amazing character and showed a step-by-step clothing, hard-surface, and prop workflows in Marvelous Designer, Maya, ZBrush.
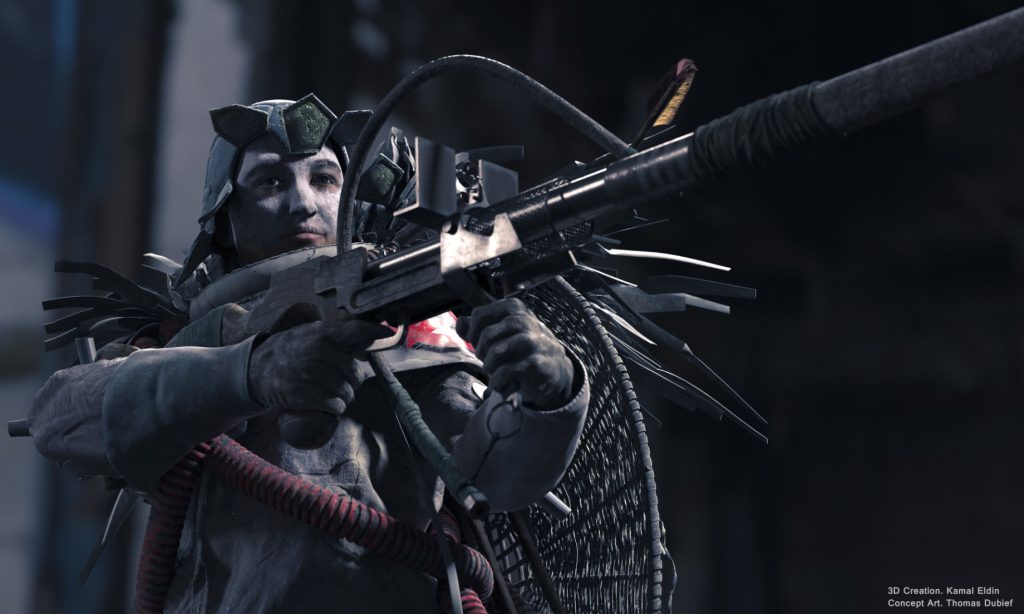
Introduction
Hello. My name is Kamal Eldin, I’m a 3D artist from Egypt, and I’ve been working in the visual effects and animation industry for around 9 years. Lately, I’ve been involved more in Real-time production and VR/AR. But my heart is always with photorealism, wherever it is.
Character creation is something that’s almost an inside calling for me personally. I love to tell stories, and characters are a powerful vessel to tell them. You can tell a story through your character’s hair, clothes, the weathering, or the smoothness of her/his boots… that’s probably the reason why we are all doing it, I guess.
Start of the Project Templar
I saw the concept art for this character and immediately fell under its spell. It was designed by Thomas Dubief; his designs are unique. This one he called ‘Templar’ and you can easily tell it’s a post-apocalypse theme. It was amazing to see how a single image can tell a very detailed and nuanced story not only about the character it features but the entire world and the era that the character lives in.
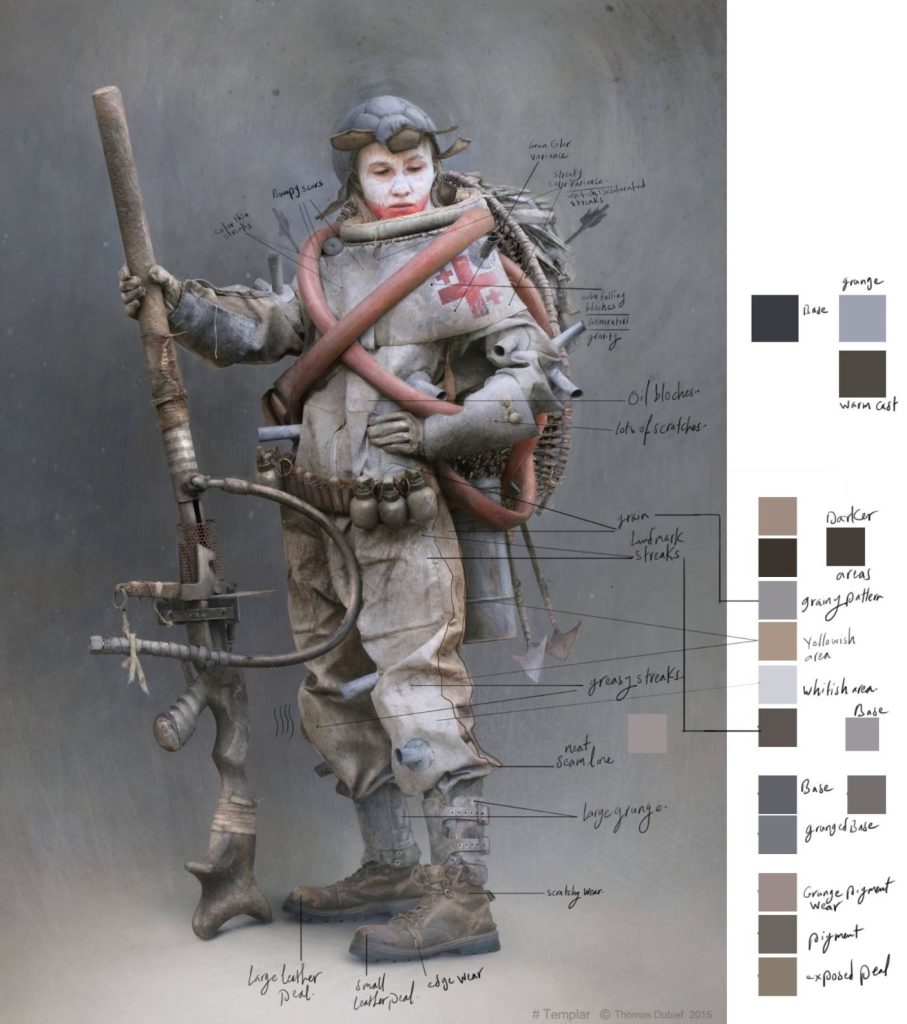
It was clear that this world is very bizarre and abnormal, yet, somehow mildly familiar. Through the dust and weathering, you can see that some features are still recognizable… and you can see how sharp of a twist this world has taken and how that the transformation of it left its imprint on the character’s face, helmet, armor, boots, and of course, her outlandish primary weapon.
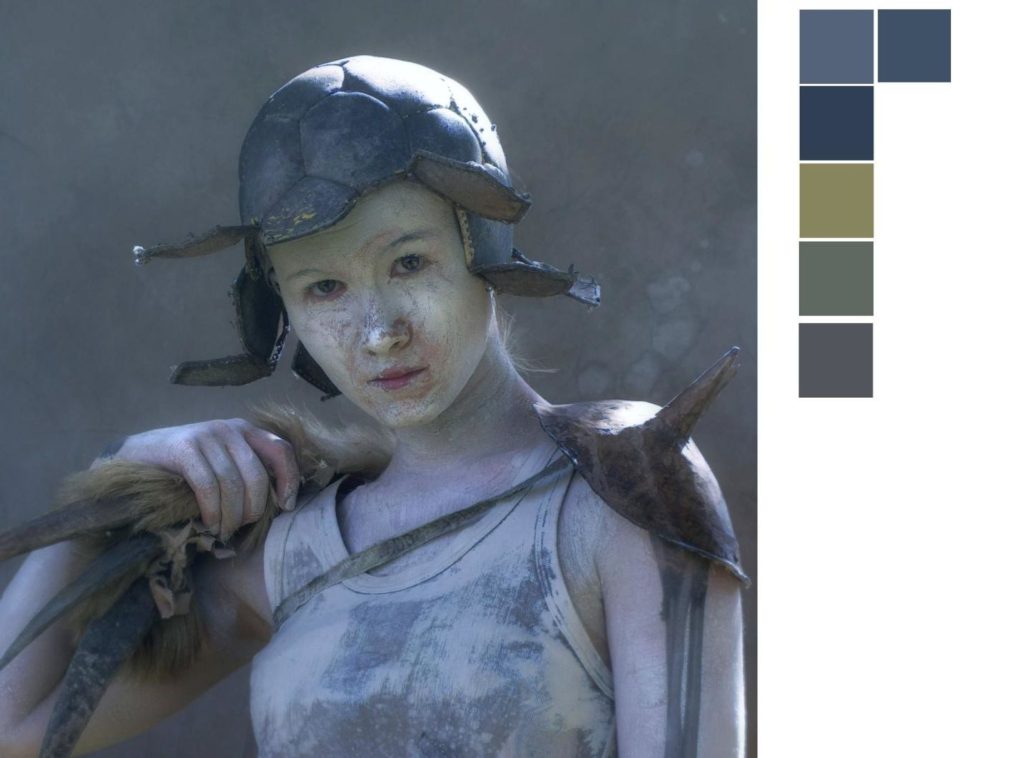
One unique feature in this design is the contrast or juxtaposition between the decay in the image and the innocent, almost rather pristine look of the petite girl who fitted herself into such an otherworldly outfit.
And this was a unique motive for me to do this character, as it’s a deviation from the overly veteran, super sexy female warrior visual style that is too common in VFX and games.
Based on this reading of the design, I realize that the challenge here would be authoring the materials and textures for the character and her props.
The most important element was the ambiguity of certain elements in the concept. And I had to make a choice, either to eliminate the ambiguity of these elements altogether by strictly defining the surface materials or carrying some of that ambiguity into the final image. I preferred the latter. It challenges the senses more, makes your eyes linger on the piece, and thus to see her story imprinted on her. And staying true to the spirit of the concept was a plus for me.
Blocking Stage
Being an old vertex pusher, I prefer to begin the creation process with a rough poly block in Maya.
Here I get to work on the stance, proportion, silhouette, and quickly and early get a rough idea of how the entire piece would look like as a whole.
In this stage, I solve the relative placement of elements, composition, relative sizes of props, how many pieces my outfit would be, what can be modeled symmetrically in its early stages and what can’t, which pieces are going to be contiguous and which will be split. And splitting or combining meshes based on the type of material or the number of elements sharing the same displacement map.
Pipeline Channels
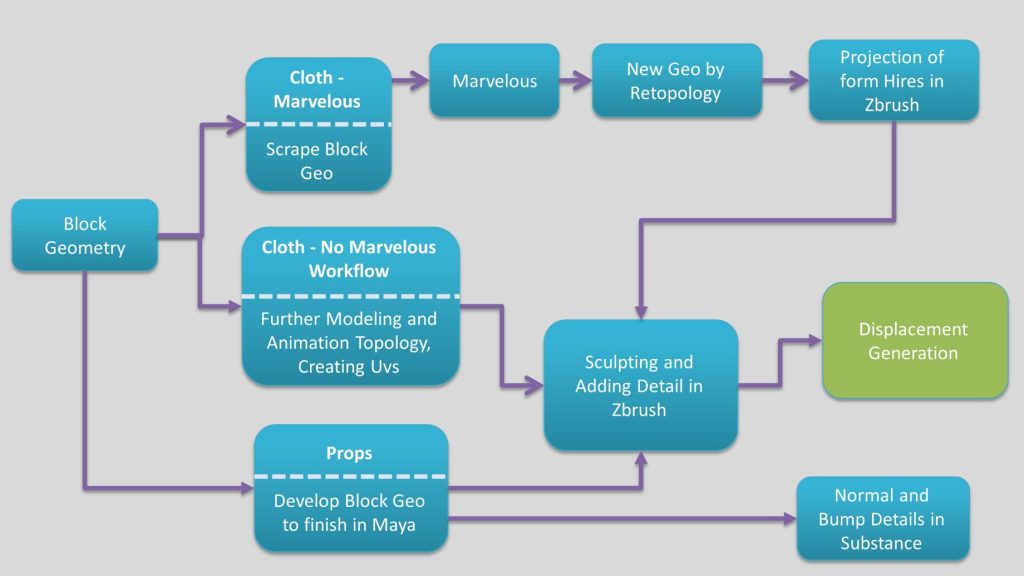
After the Blocking stage is finished, I then take the geo further, dividing them into 3 categories:
- Pieces that will be modeled in Marvelous Designer: these will be left as they are and will be replaced by new Topology.
- Pieces that won’t be designed in Marvelous: for these the block geo will be developed into further in Maya with animation topology to be later detailed in ZBrush.
- Elements that require no Displacement maps: will be through roughly modeled in Maya to finish.
Then I start developing each piece according to its category to the next phase in the relative software.
Notes on Surface Detailing
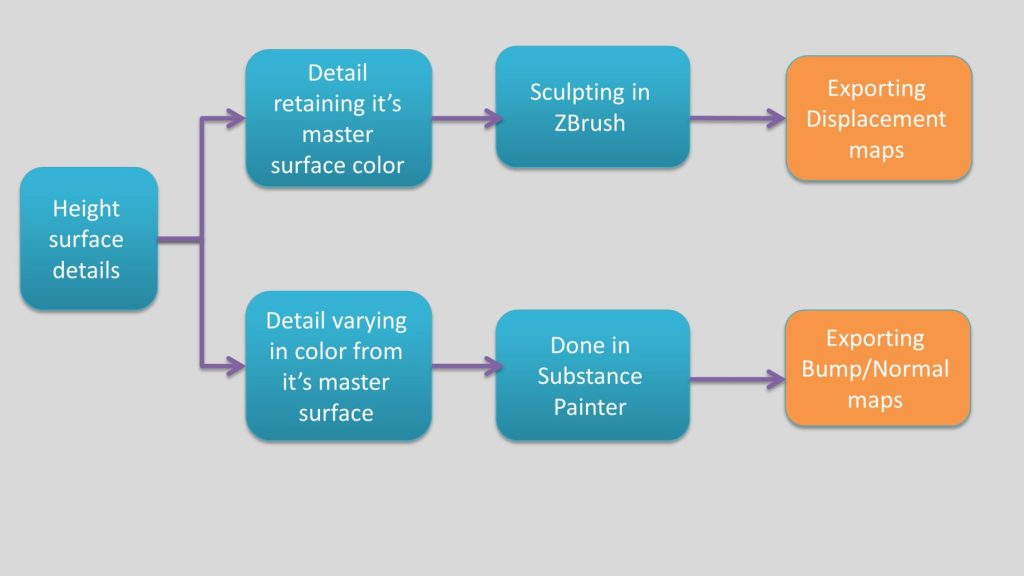
I also tend to break down surface detail into 3 main categories:
- Details with the same color of its underlying surface: these I do in ZBrush in the sculpting phase and bake in the displacement map.
- Surface details that are colored differently than the parent surface, for example, cloth stitches. Texturing for these is done in Substance Painter, and I bake in a normal map to take advantage of the capability of multi-channel painting in SP. For each stroke, I can paint height along with its color and specular value in one shot. This is an advantage over ZBrush here, as you don’t need to do a workaround to mask the height details in your ZBrush sculpt to be able to color them differently later.
- Face surface details and diffuse: These are done in Mari, provided I have access to XYZ Displacement maps and get back to ZBrush for a unified displacement map.
Mari’s layer system and adjustment/Filters are robust, and its projection tools are far more superior than ZBrush. Also, you can get along well with Mudbox for projection. I don’t prefer ZBrush for this task due to its lacking layer system.
The Head
The head is done based on one of 3d.sk images that I had for years – their model Kamilia. I picked her because she was giving this pristine and innocent look that I’m looking for. I wanted to go as far as I can from the typical veteran warrior look.
- Starting from a UVed base mesh and doing initial modeling in Maya to grab the basic likeness.
- Switching to ZBrush for more sculpting and getting as close to her likeness as possible.
- Finishing the sculpt and refining the UVs in Maya.
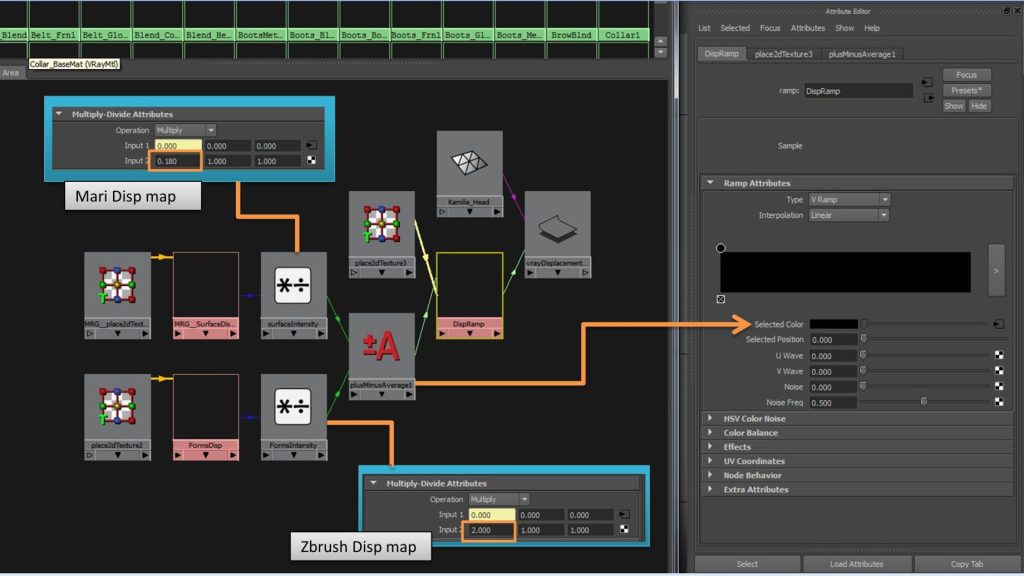
- Switching to Mari, Projecting and painting Diffuse and projecting XYZ Disp maps.
- Exporting the projected displacement map from Mari (surface XYZ map).
- Exporting the original Displacement map from ZBrush (Form sculpting map).
- Combining the two maps via a shader network in Maya. For that, I recommend reading this article.
I just replicated the network demonstrated by Jeremy Celeste and found the correct values for V-Ray. This gives the advantage of total control of your Disp maps components in look development.
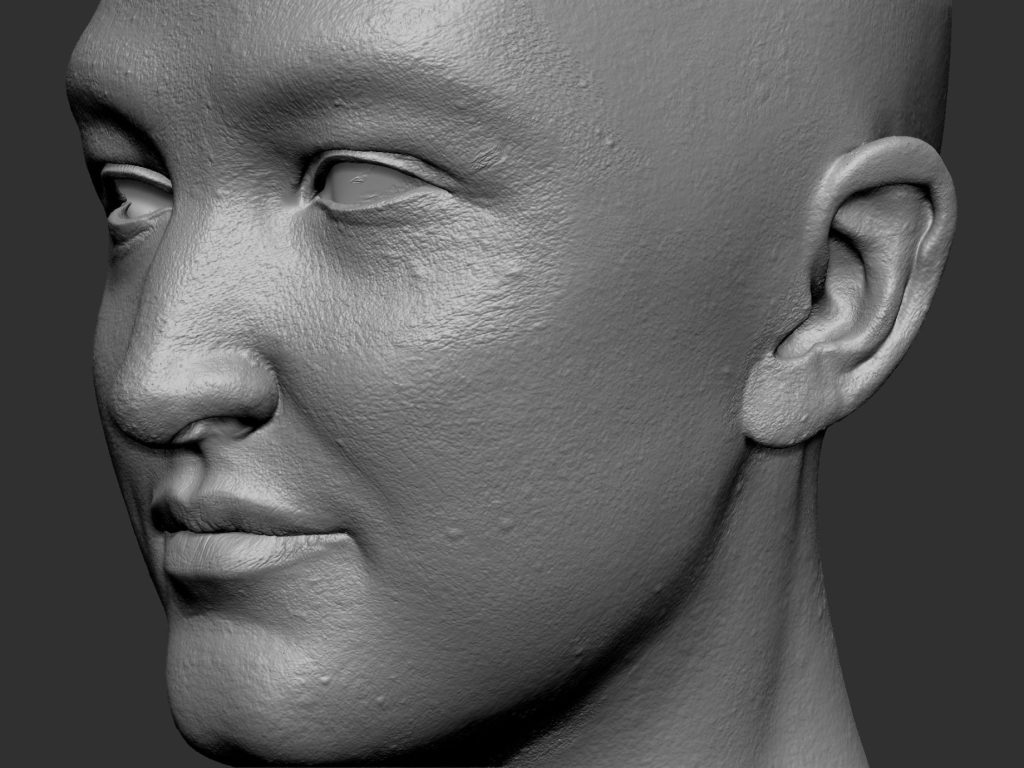
Here are the combined maps in ZBrush brought only for preview:
Clothing Workflow
THE SUIT: MARVELOUS WORKFLOW
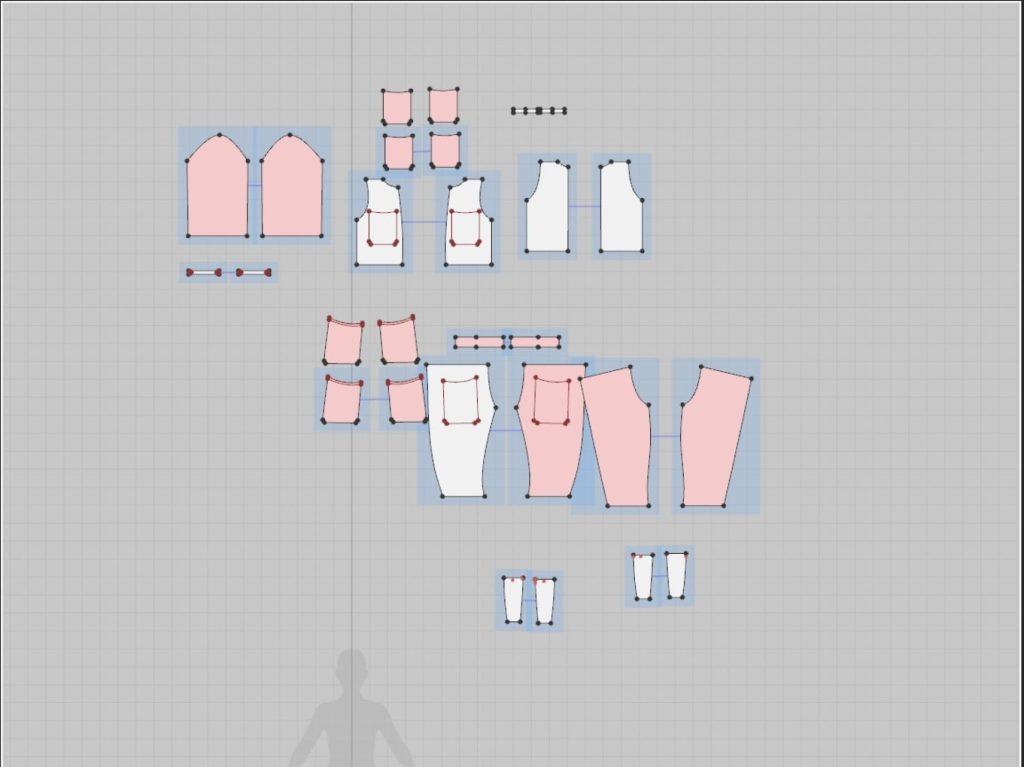
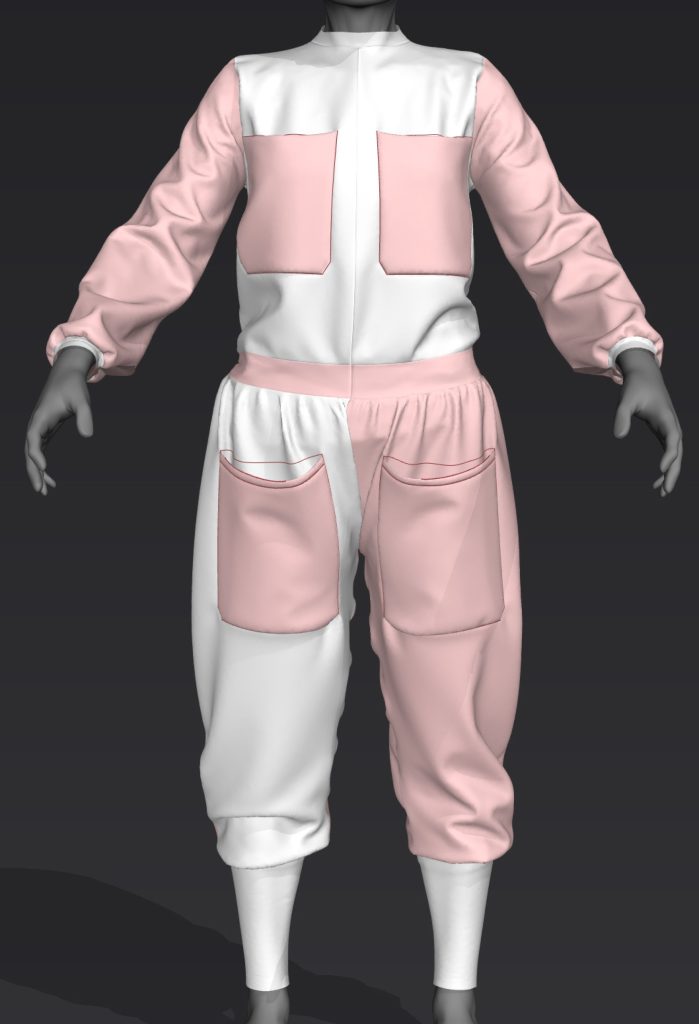
The clothing was done in Marvelous, using the base female body as an avatar. The girl is petite in size, but the suit was a bit buffy, so:
- First, I used some of the Marvelous Designer’s stock patterns as an underlying outfit, and I froze that, then I designed the suit patterns on top.
- I prefer exporting a Quadrangulated mesh from Marvelous, this saves me a step ahead so that I don’t have to ZRemesh in ZBrush and reproject.
- I process the exported Hi Poly mesh in ZBrush to define and maintain my cloth Seams and Edge Creases.
- Retopologized the mesh in Maya via Quad Draw.
- Created UVs for the suit and divide them into 2 UDIMs.
- Then projected the Hipoly details on the mesh in ZBrush.
- In the end, a manual detail pass was added on top in ZBrush.
- Now the mesh is ready for 32-bit displacement map extraction.
THE GLOVES & BOOTS
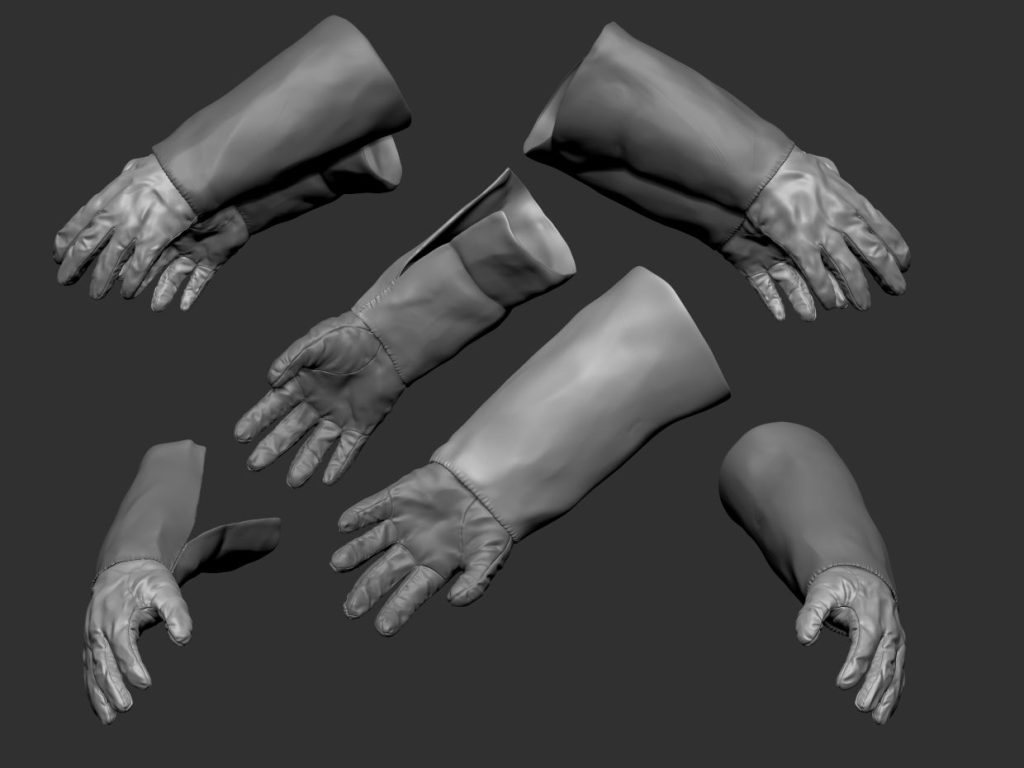
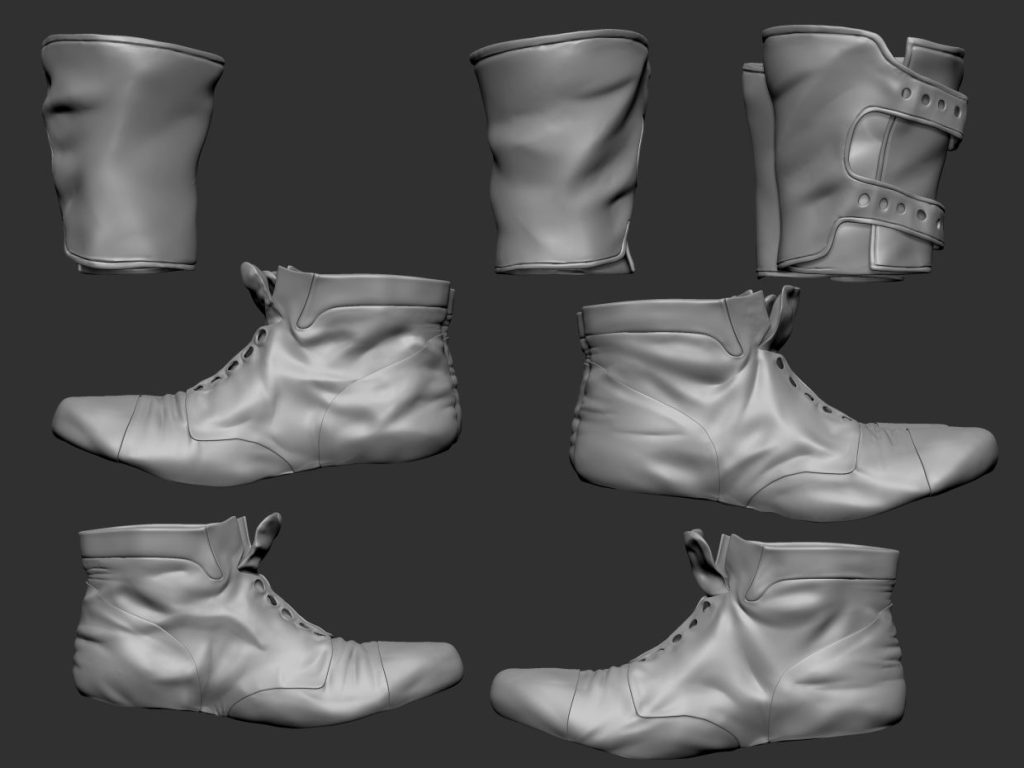
- These were poly modeled in Maya then detailed in ZBrush.
- Left and Right gloves share a displacement map sequence in 2 UDIM tiles, the same for boots.
- 32-bit Displacement maps extracted in ZBrush.
HELMET
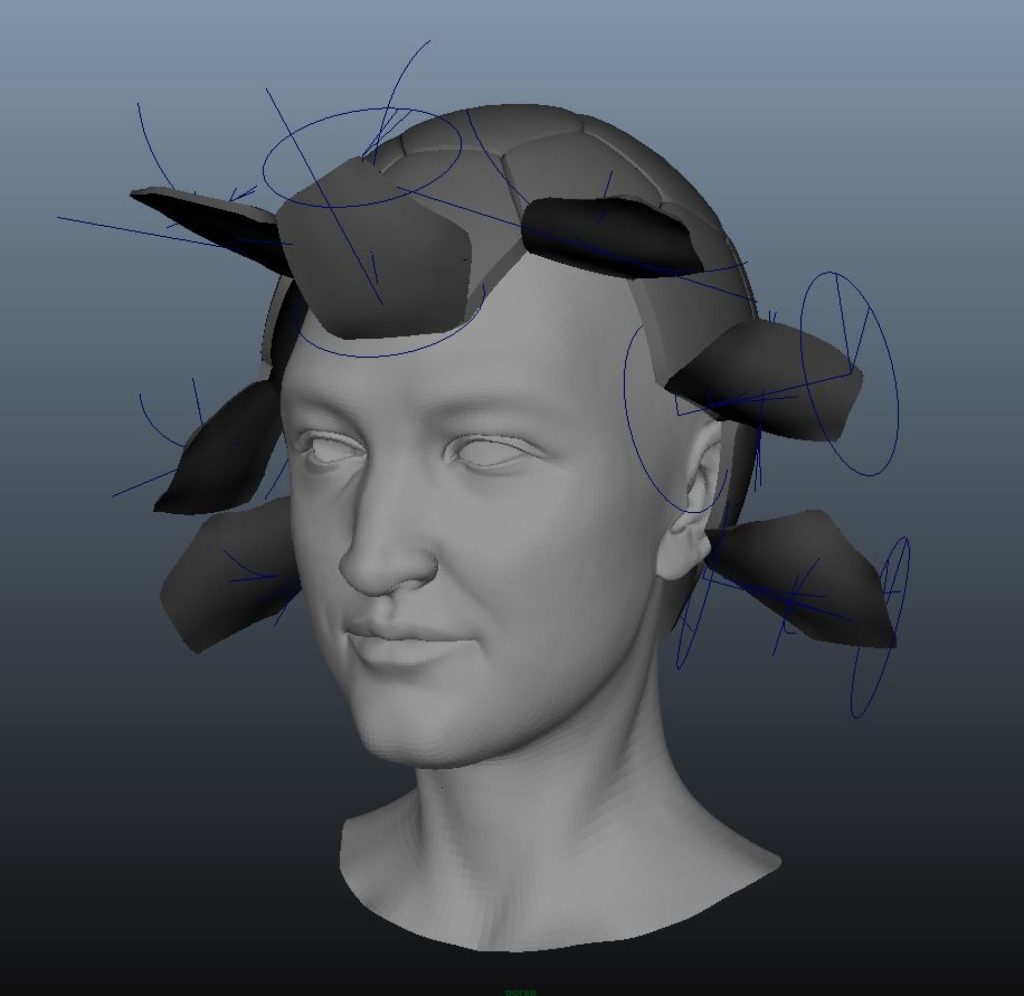
If you are confused, the helmet is actually a torn soccer ball. This is really when you get to appreciate the ingenuity of this design.
There is a nice video tutorial for their credit showing how to model a soccer ball, I used pretty much the same technique with a little twist:
- For the floating flaps of the ball, I used Bend and Twist deformers in Maya to introduce some wearing effects.
- ZBrush used for detailing. This is when I realized doing stitches in ZBrush is not a good option for me.
- One 32-bit Displacement extracted.
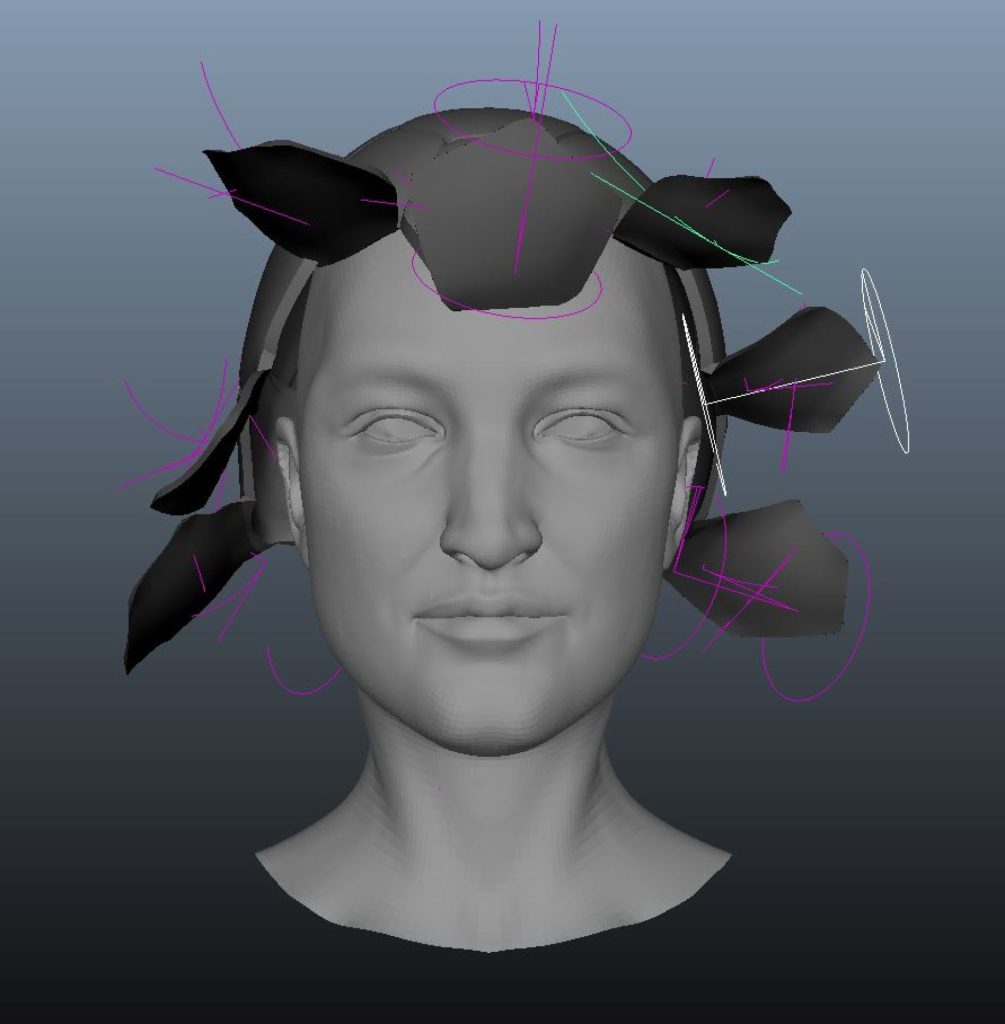
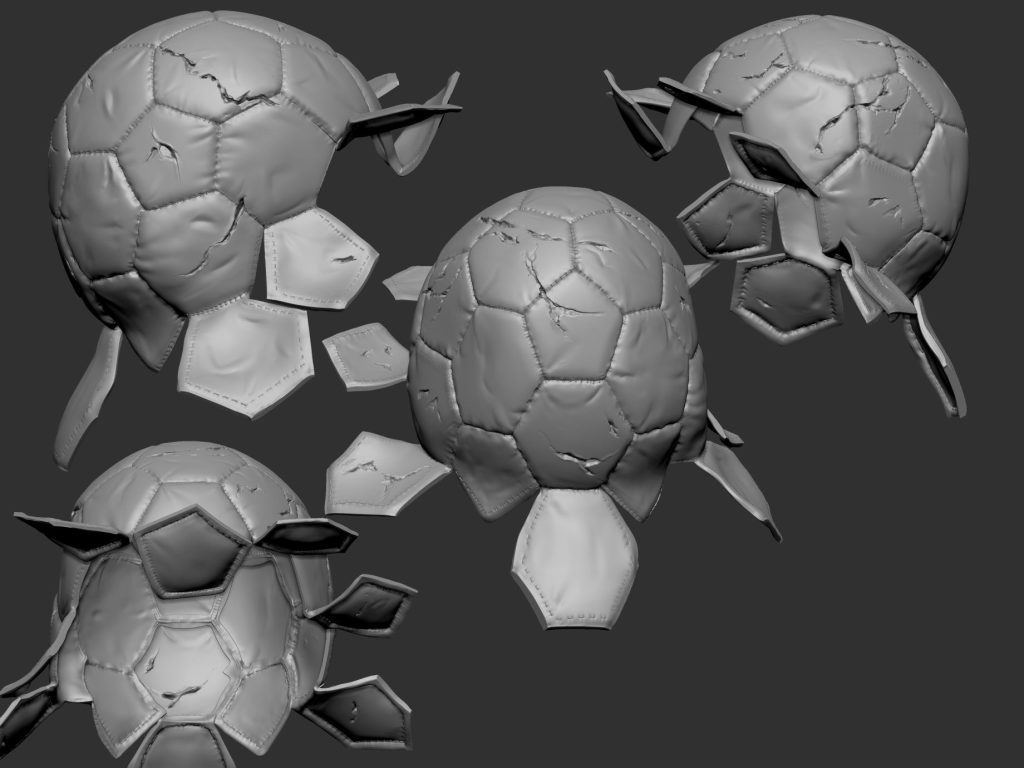
Don’t do stitching in ZBrush!
STITCHING
Most of the stitching was left to be done in Substance Painter. It resulted in two things:
- Saving me from over subdividing the mesh (you probably will have to go to 20+ million polys for each sub-tool to get well-defined stitches, which is a no-brainer for me and my machine)
- Giving easy control over the stitches’ color and material properties
Hard Surface & Props Workflow
THE WEAPON: MAYA WORKFLOW
- The weapon handle is curvy and for this, I used Nurbs curves and the Birail, loft tools to preserve the smoothness of the surface. However, If I’d do this again today, I’d turn to Moi3D for doing this.
- The rest of the Weapon was poly modeled.
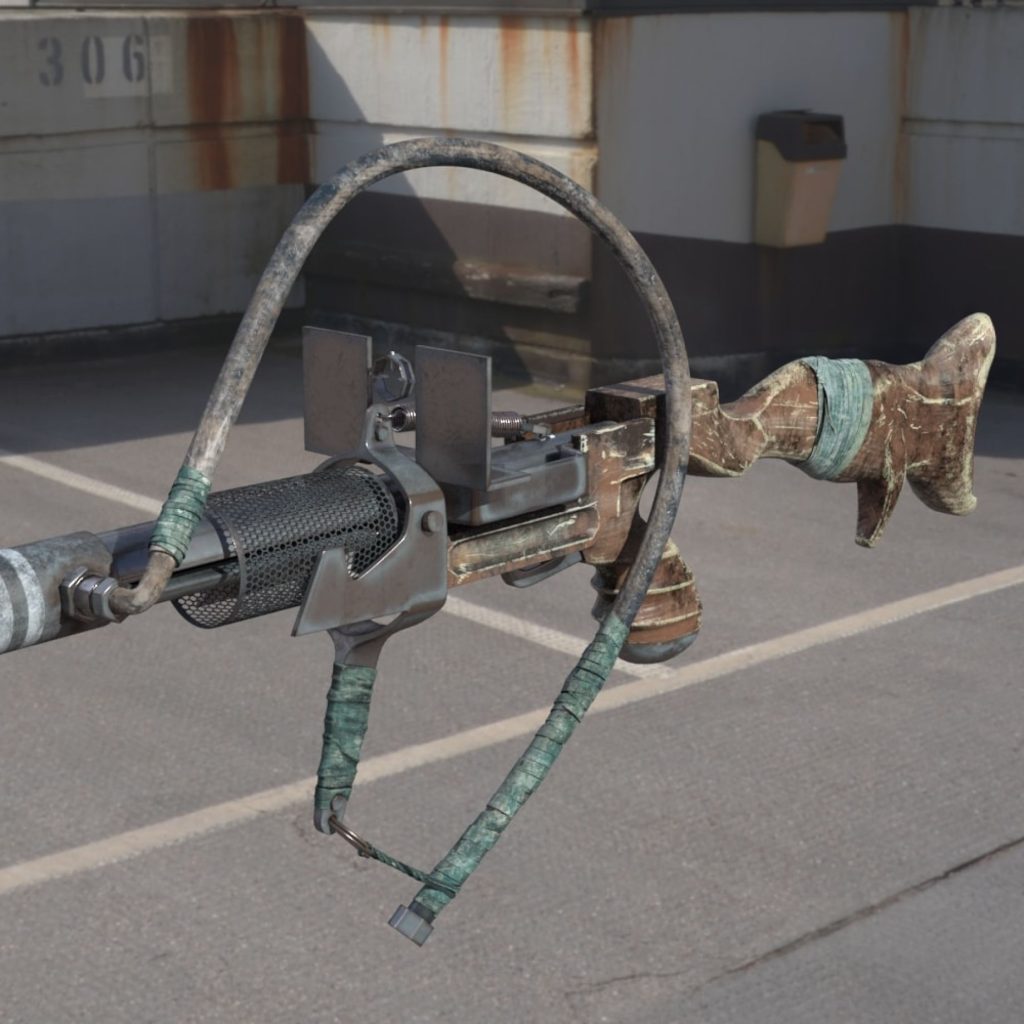
THE WICKER SHIELD: MAYA WORKFLOW
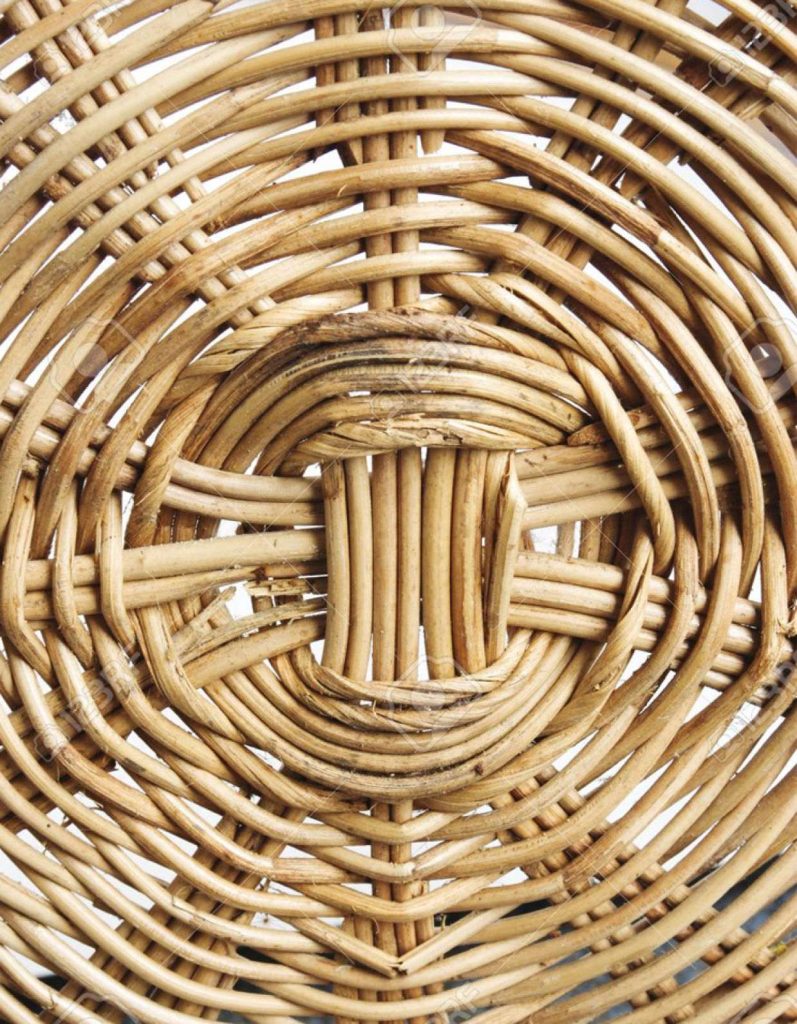
One of the main elements in the concept is this wicker shield. This was done by drawing curves and generating paint effects tubes on them; this resulted in:
- Having seamless control over the size
- Easy to control the twisting angle on all the wicker strands in one go via the paint effects properties
- Have ready UVs for free
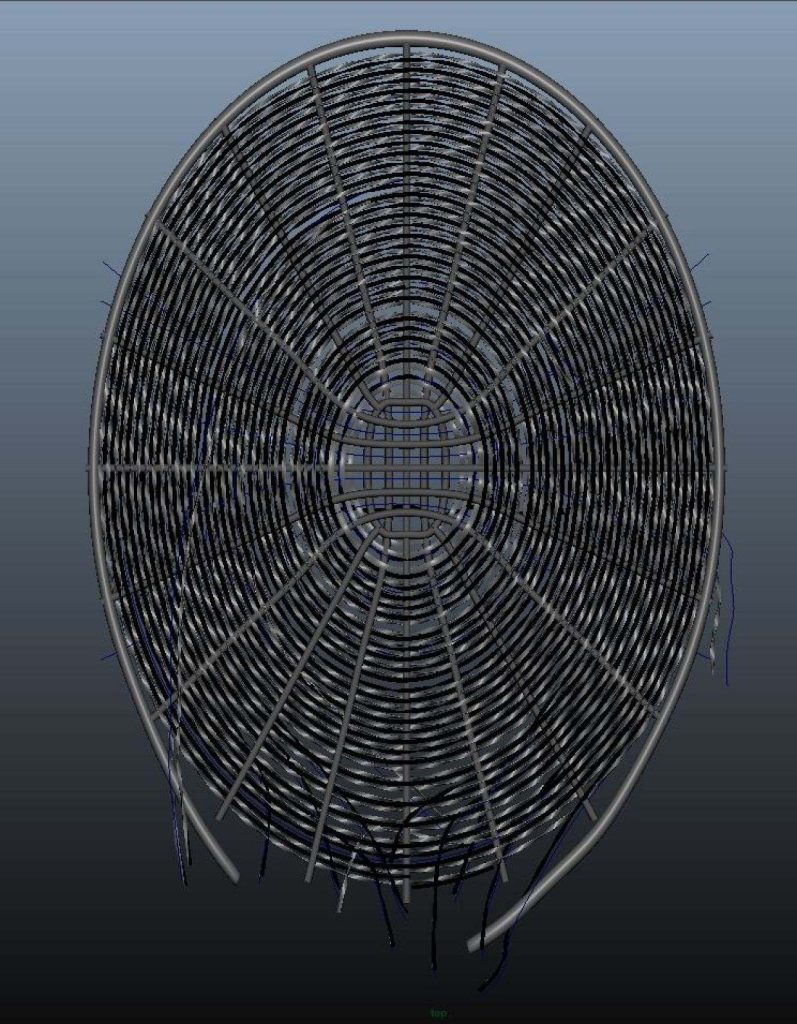
You can dissect the wicker shield in 3 components; for each you create a curve and then generate paint effects tubes on them:
- The outer Beam > This I started from a torus.
- The Radial Rips > create curves for each radial rib and generate a paint effect tube for all the curves.
- The Ring weave strands > each weave consists of 2 circular twisting strands; one strand goes on top of the Radial Ribs in a sine wave manner, and the other does the same but as the inverse of that sine wave. How’s that?
- First, I created all the strands flowing along the same sin wave over and beneath the Radial Beams, basically one curve and duplicating and offsetting it then generating tubes on them. Keep the pivot centered at the shield center.
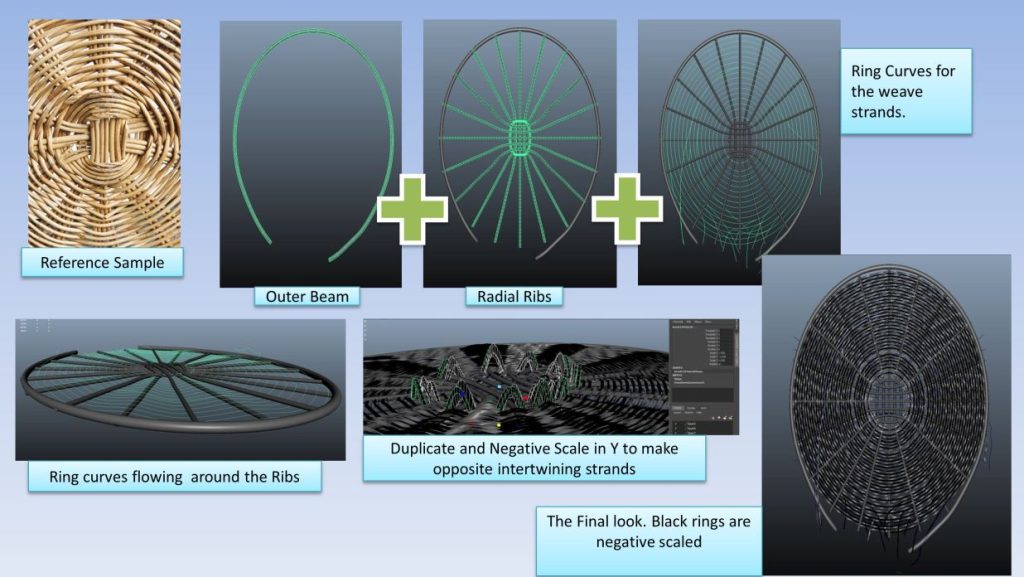
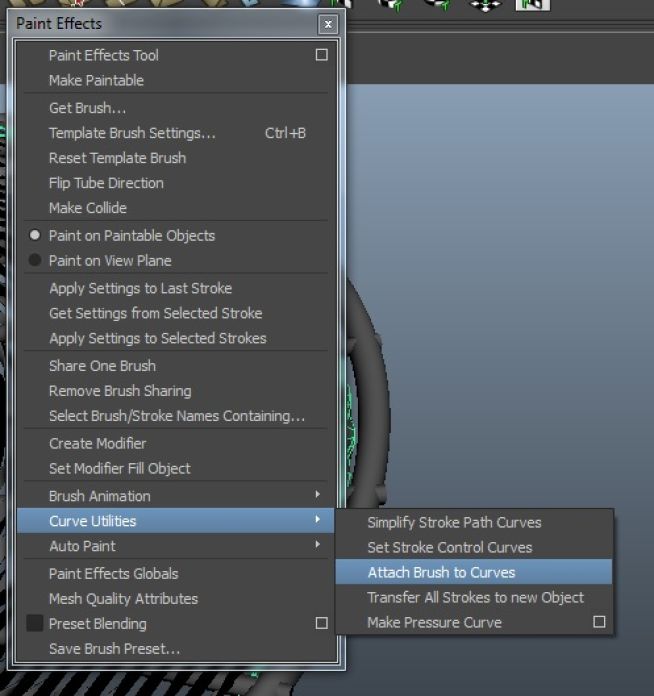
You can make all the tubes share one stroke via the paint effects menu > Curve Utilities > Attach Brush to Curves.
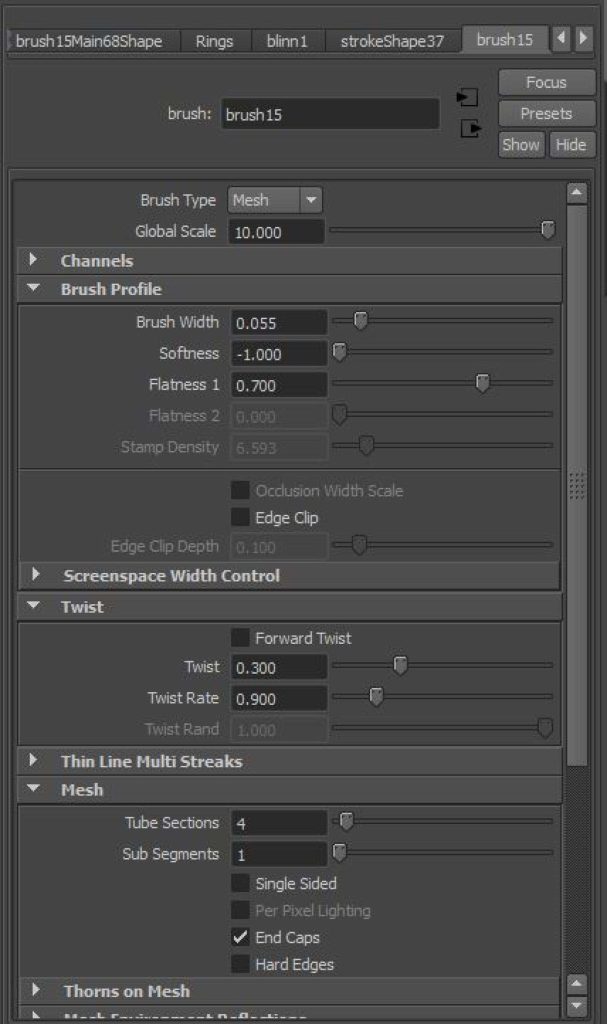
Adjust the Global scale – twist angle – Flatness – Brush width on the paint effects stroke attributes to adjust the shape of the strands.
- Then duplicate those tubes (not the curves) with the input graph on in duplicate special and just offset by translating them a bit away from their originals.
- Now if you invert scale vertically the newly duplicated tubes you will have the strands flowing in the opposite sine wave around the Radial Ribs.
- Now, you can manually cut curves and control their CVs to create tears and trims on the edges of the shield.
GRENADES, BELT, SHELLS
All poly modeled in Maya. This is standard stuff, normal vertex pushing. I’m sort of a topology nerd.
Character Sculpt with Assets in ZBrush
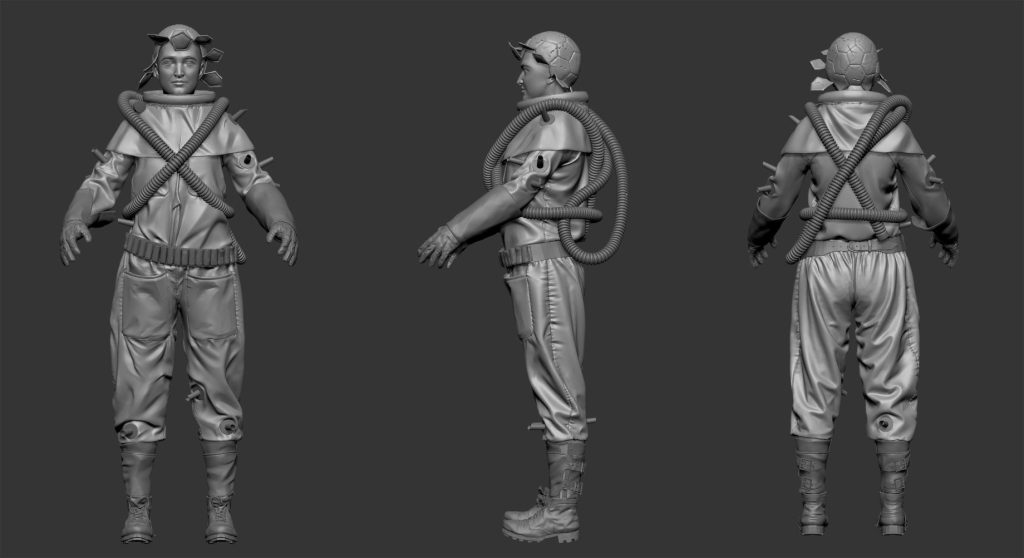
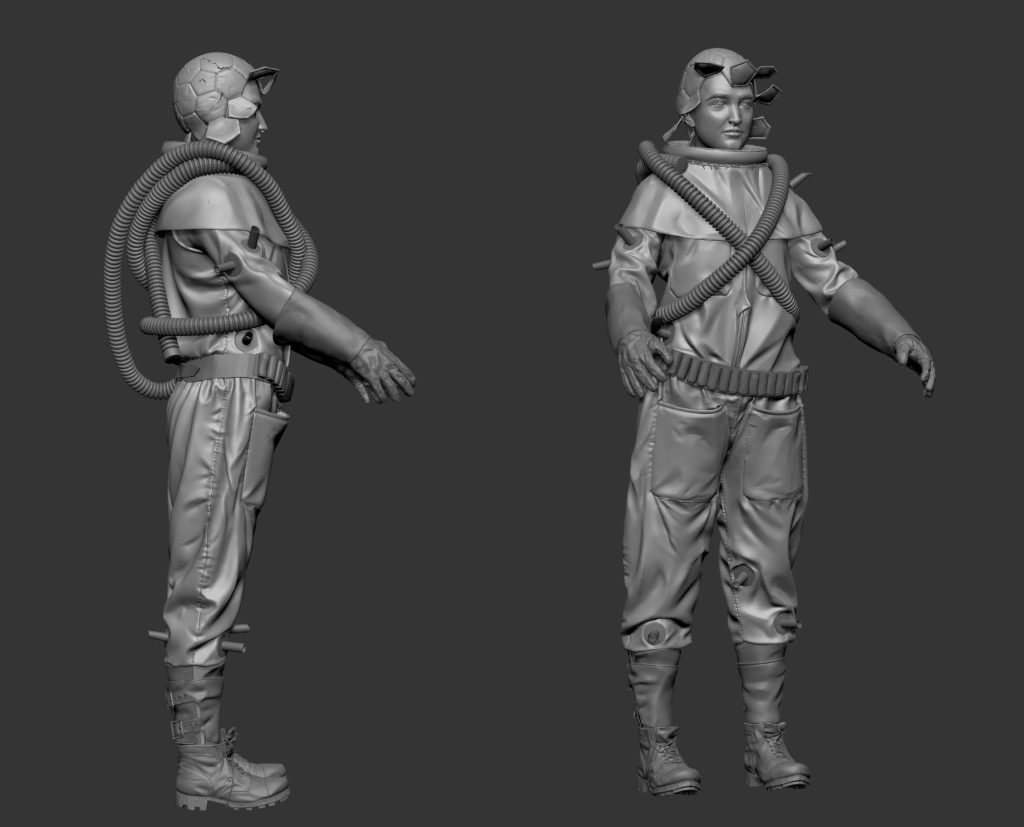
Texturing in Substance Painter
My texturing package of choice is Substance Painter for non-skin elements. It helps a lot in saving time, and you can easily see a live preview of the final image.
Substance works great for surface height details, which vary in color from the parent surface. This character as mentioned before has multiple UDIMs, and as you can’t paint seamlessly across UDIMs in Painter. From the beginning, you have to choose wisely where to divide your UDIMs. But it’s not that of a hustle.
However, there is one note:
I get that Painter is procedural, and hence it’s power, but you have to be really aware not to fall into the generic texture look that many painter users produce. The end results have some sort of a visual imprint that makes it easy to recognize a generic look of a texture and tell, oh that’s Substance Painter work.
To overcome this, let us do one thing – “Paint”:
- Put a paint layer on top of your stack and paint your additional details manually using various brushes and alphas.
- Use stencils, lots of stencils, either to paint color or edit the procedural masks that painter gets you.
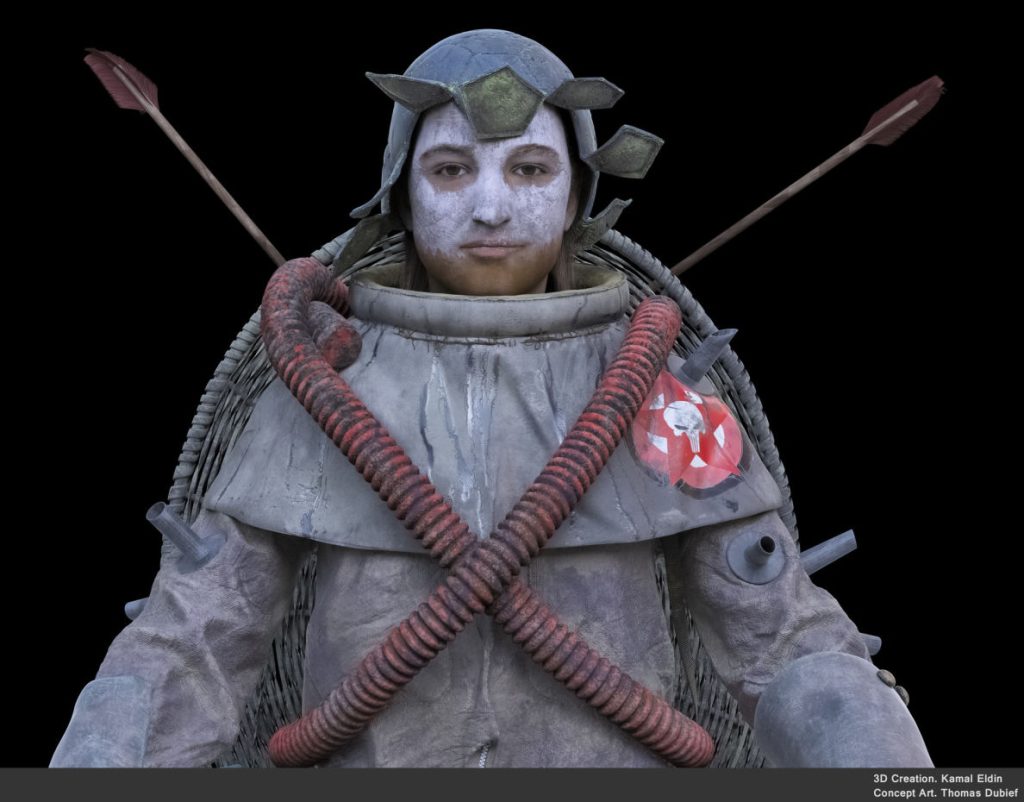
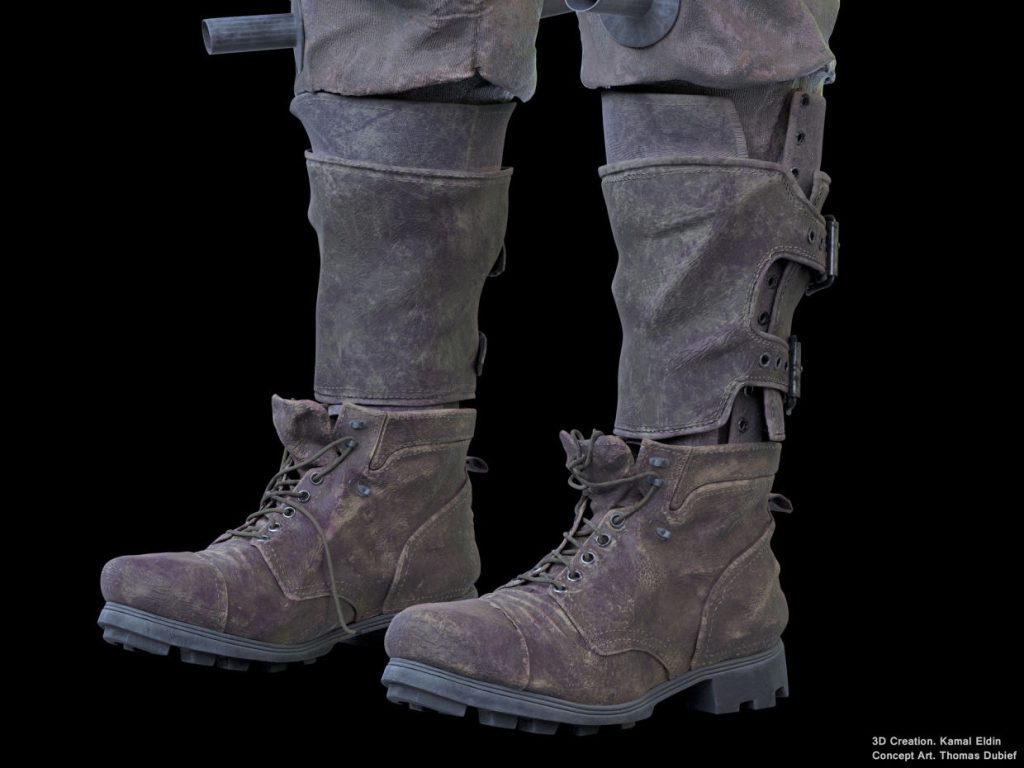
TEXTURE EXPORT TO V-RAY
I don’t use the presets, I rather prefer to export the maps and their masks separately and reassemble them manually in my shader network in Maya. This gives me maximum control over the look development process without the need to jump back and forth to Substance.
Sculpting with Light
The story is plain and simple, as for presentation I don’t use HDRIs that much.
Start with a simple 3-point light scenario:
- A key light: your high-intensity primary light, it defines your major light vs dark spaces.
- Add a fill light to slightly bring light to the dark side.
- A Rim light from behind the character to separate it from the background.
- Adding more lights to bring more brightness or specular effects to preferred areas.
To reach a successful light scheme, you should be aware that the final look is driven by the following parameters simultaneously:
- Light direction: move the light to define where the shadow falls and how its shape on the object.
- Light size: affects the intensity of the light and the softness of the shadow and the size of specular reflection. Small lights produce sharper highlights which may help define skin detail more.
- Light distance: affects the intensity and size of the shadow and its softness.
- Light intensity
Rendering the Character in V-Ray
Memory management can prove to be a real issue especially for a personal project at home with modest resources.
Due to the number of maps and their sizes, your ram might get overflooded and the rendering process would literally freeze as a result. The solution to this is the implementation of Tiled Tiff (.tx) Mipmapping or Tiled OpenEXR.
Tiled Mipmapping
This is a process where you convert your textures into a grid of small tiles, so instead of fully loading a 300 MB map to memory, this map is divided into small tiles, each tile would be loaded in memory only on demand in the rendering of a portion of the image, and then unloaded after the finish, freeing the memory load for other tasks.
You can use nMakeTx tool to Mipmap your textures by converting them into .tx files, it works for V-ray as well.
For more info, explore these articles:
Luckily for Arnold users, in Maya, this is just a tick you place in the file node.
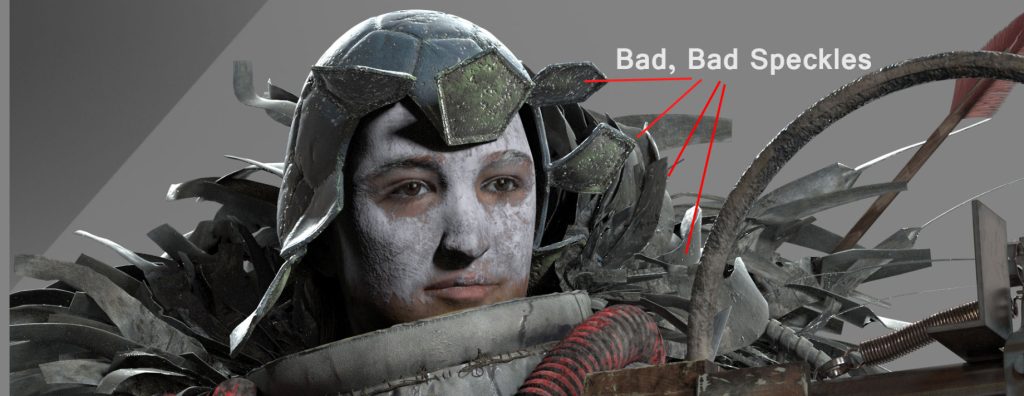
Eliminating White Speckles
During your render, you might encounter very bright dots that are stubborn to eliminate.
- Raising your samples is a start but not a total solution.
- Reducing your max ray intensity setting will help a lot but may not totally resolve all the points and it may cut away from the brightness values.
- Surprisingly I found that the type of Color Mapping method implemented, has a great deal in resolving white points, for me I choose HSV exponential or Intensity exponential as they work better preserving Hue and Saturation. Voila, all white points are gone!
Final Image and Post Effects
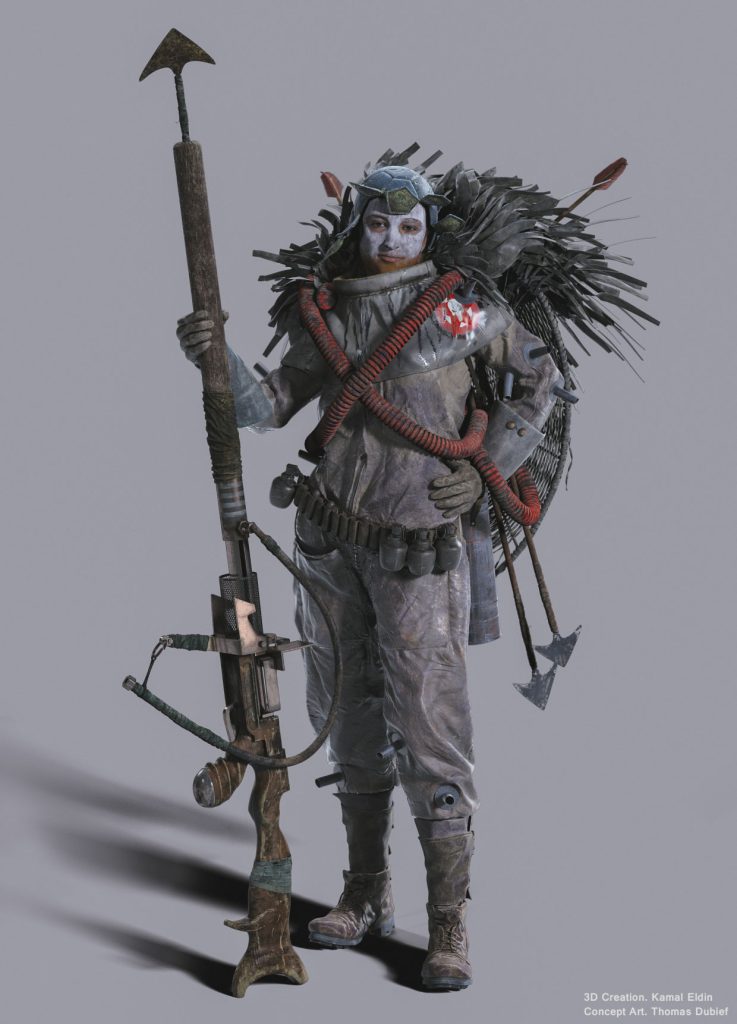
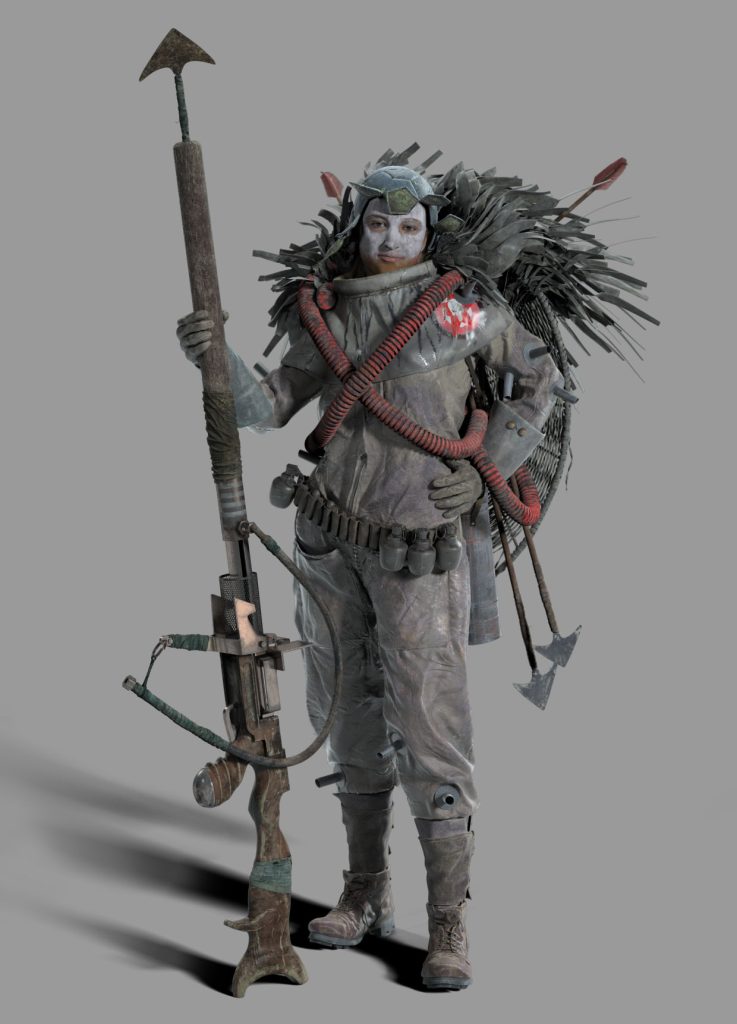
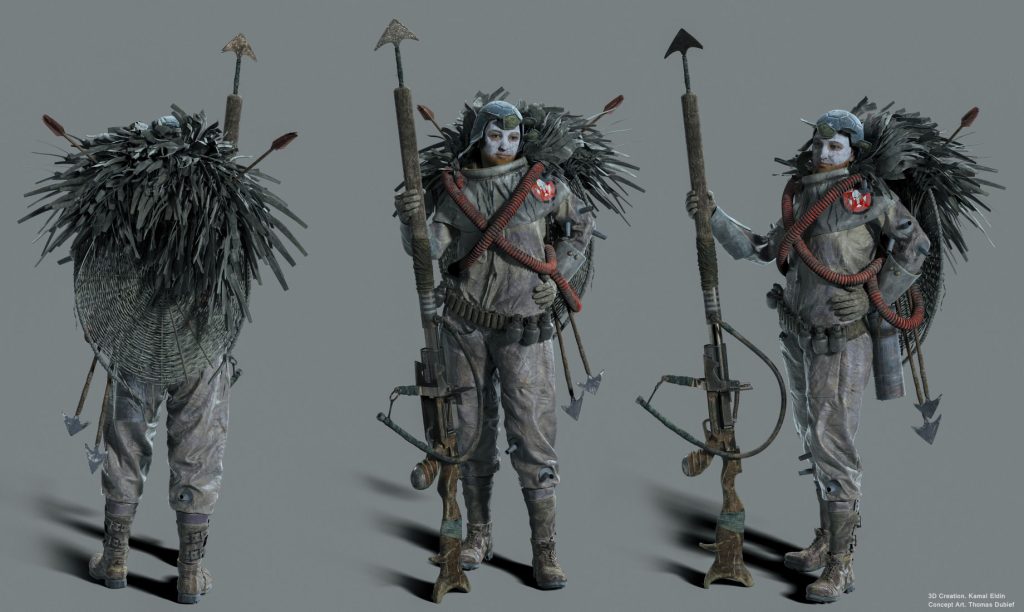
Here is the final V-Ray render with post effects in Lightroom featuring the VSCO presets with additional retouching:
CGMA
I really consider myself lucky to find people like Peter Zoppi, Satoshi Arakawa, Christian Bull, and Chris Nichols at CGMA, who have helped me a lot to develop the skill and knowledge that I wanted. Their artistic and technical insight was deep and well-structured. Probably the most precious thing I learned with them is to know how to plan and analyze a project like this, manage my resources, design my workflow and select the right tools to bring my project or task to a finish. Also learning Mari was totally priceless with Chris Nichols. In the end, getting comfortable with the wide toolset and techniques that are required today to do a realistic character was a milestone for me.


