Building Weapons And Props for Games
Matt Mattice did an overview of the weapon production process he learned during “Weapons and Props for Games” course taught by Ethan Hiley at CG Master Academy.
Introduction
Hello, my name is Matt Mattice. I am a 3D artist from Rancho Murieta, CA currently looking for work in the video game industry. I have a Bachelor’s Degree in Computer Animation and Game Development from California State University, Chico. During my time at Chico, I learned many aspects of game design, but found that I had a strong passion for 3D modeling, and texturing. I began modeling guns in my Senior year and discovered that with each gun that I created, I faced different challenges, which kept me coming back for more. After graduating I continued to work on guns and eventually found out about “Weapons and Props for Games” taught by Ethan Hiley on CG Master Academy. I quickly signed up for the class, because I really wanted to explore AAA weapon development.
“Weapons and Props for Games” is a six-week course that consists of video lectures, Live Q+A sessions, and personalized feedback videos on homework that is turned in every week. Within the six week schedule (shown below), my project, the SIG MPX with an Aimpoint Micro attachment, went from basic blocked out shapes to a fully finished game-ready weapon, and attachment.
Course Layout
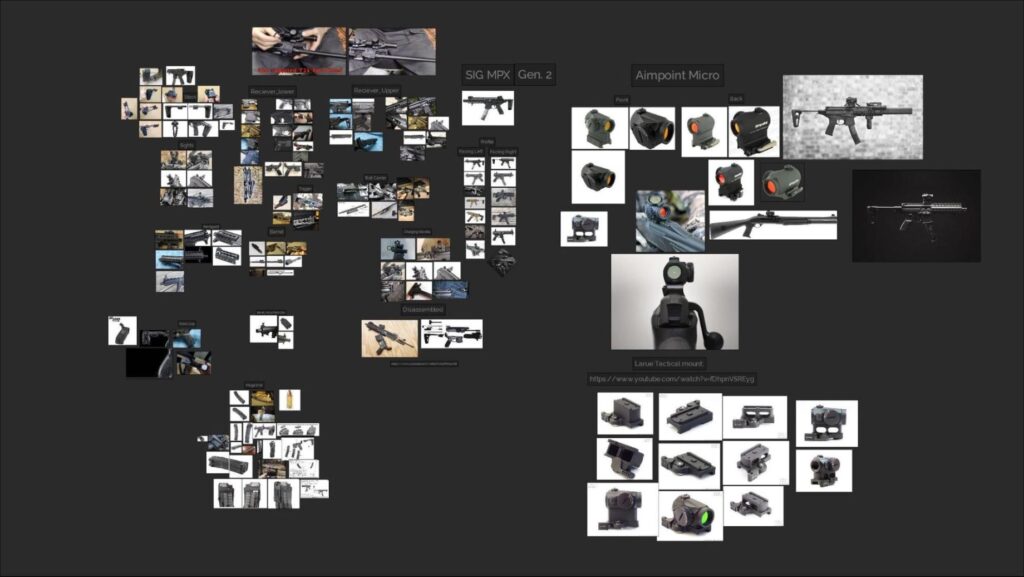
- Week 1: Gather Reference. Begin Blockout.
- Week 2: Create Aimpoint Micro + Finish Blockout (SIG MPX and Aimpoint Micro)
- Week 3: Start creating the High Poly.
- Week 4: Finish High Poly, and Create Low Poly (Sig MPX, and Aimpoint Micro).
- Week 5: UV + pack with care.
- Week 6: Bake, Texture, and Render.
Ethan gave us choices of weapons and attachments that we could model for the class, so I chose the SIG MPX, and the Aimpoint Micro. I chose the Aimpoint Micro for the SIG MPX because in many of the images that I had seen online of the SIG MPX, it often had a smaller scope or red dot sight, so the Aimpoint Micro just seemed like the best choice considering its size and the size of the SIG MPX.
Project
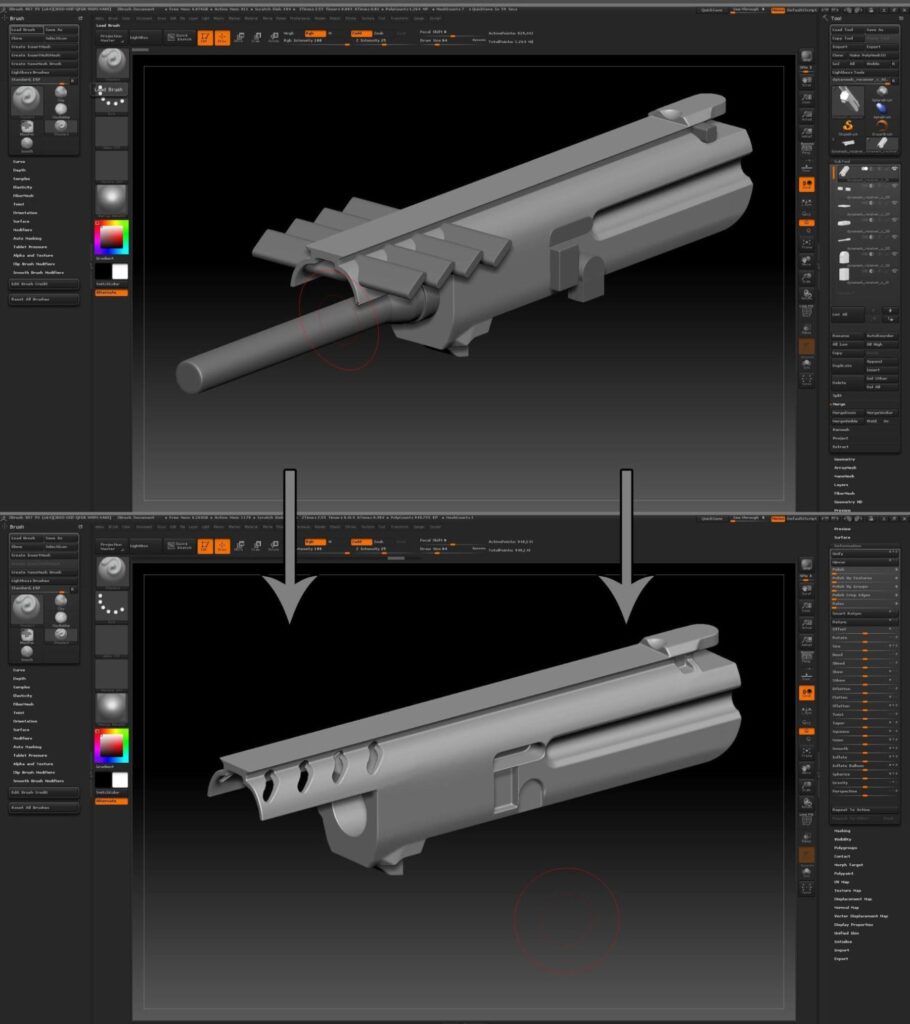
With this project, I really wanted to try utilizing ZBrush while modeling the high poly. Before the class, I had read a polycount forum page that talked about using Dynamesh “boolean operations” inside of Zbrush, along with the “polish” feature to generate really clean hard surface high poly meshes. I had tried to replicate the process a few times without any luck. Needless to say, I was really excited when Ethan had mentioned using this method in the class, and I was finally able to learn how to use that workflow properly. Using the Dynamesh and Polish workflow saves so much time when creating a high poly object.
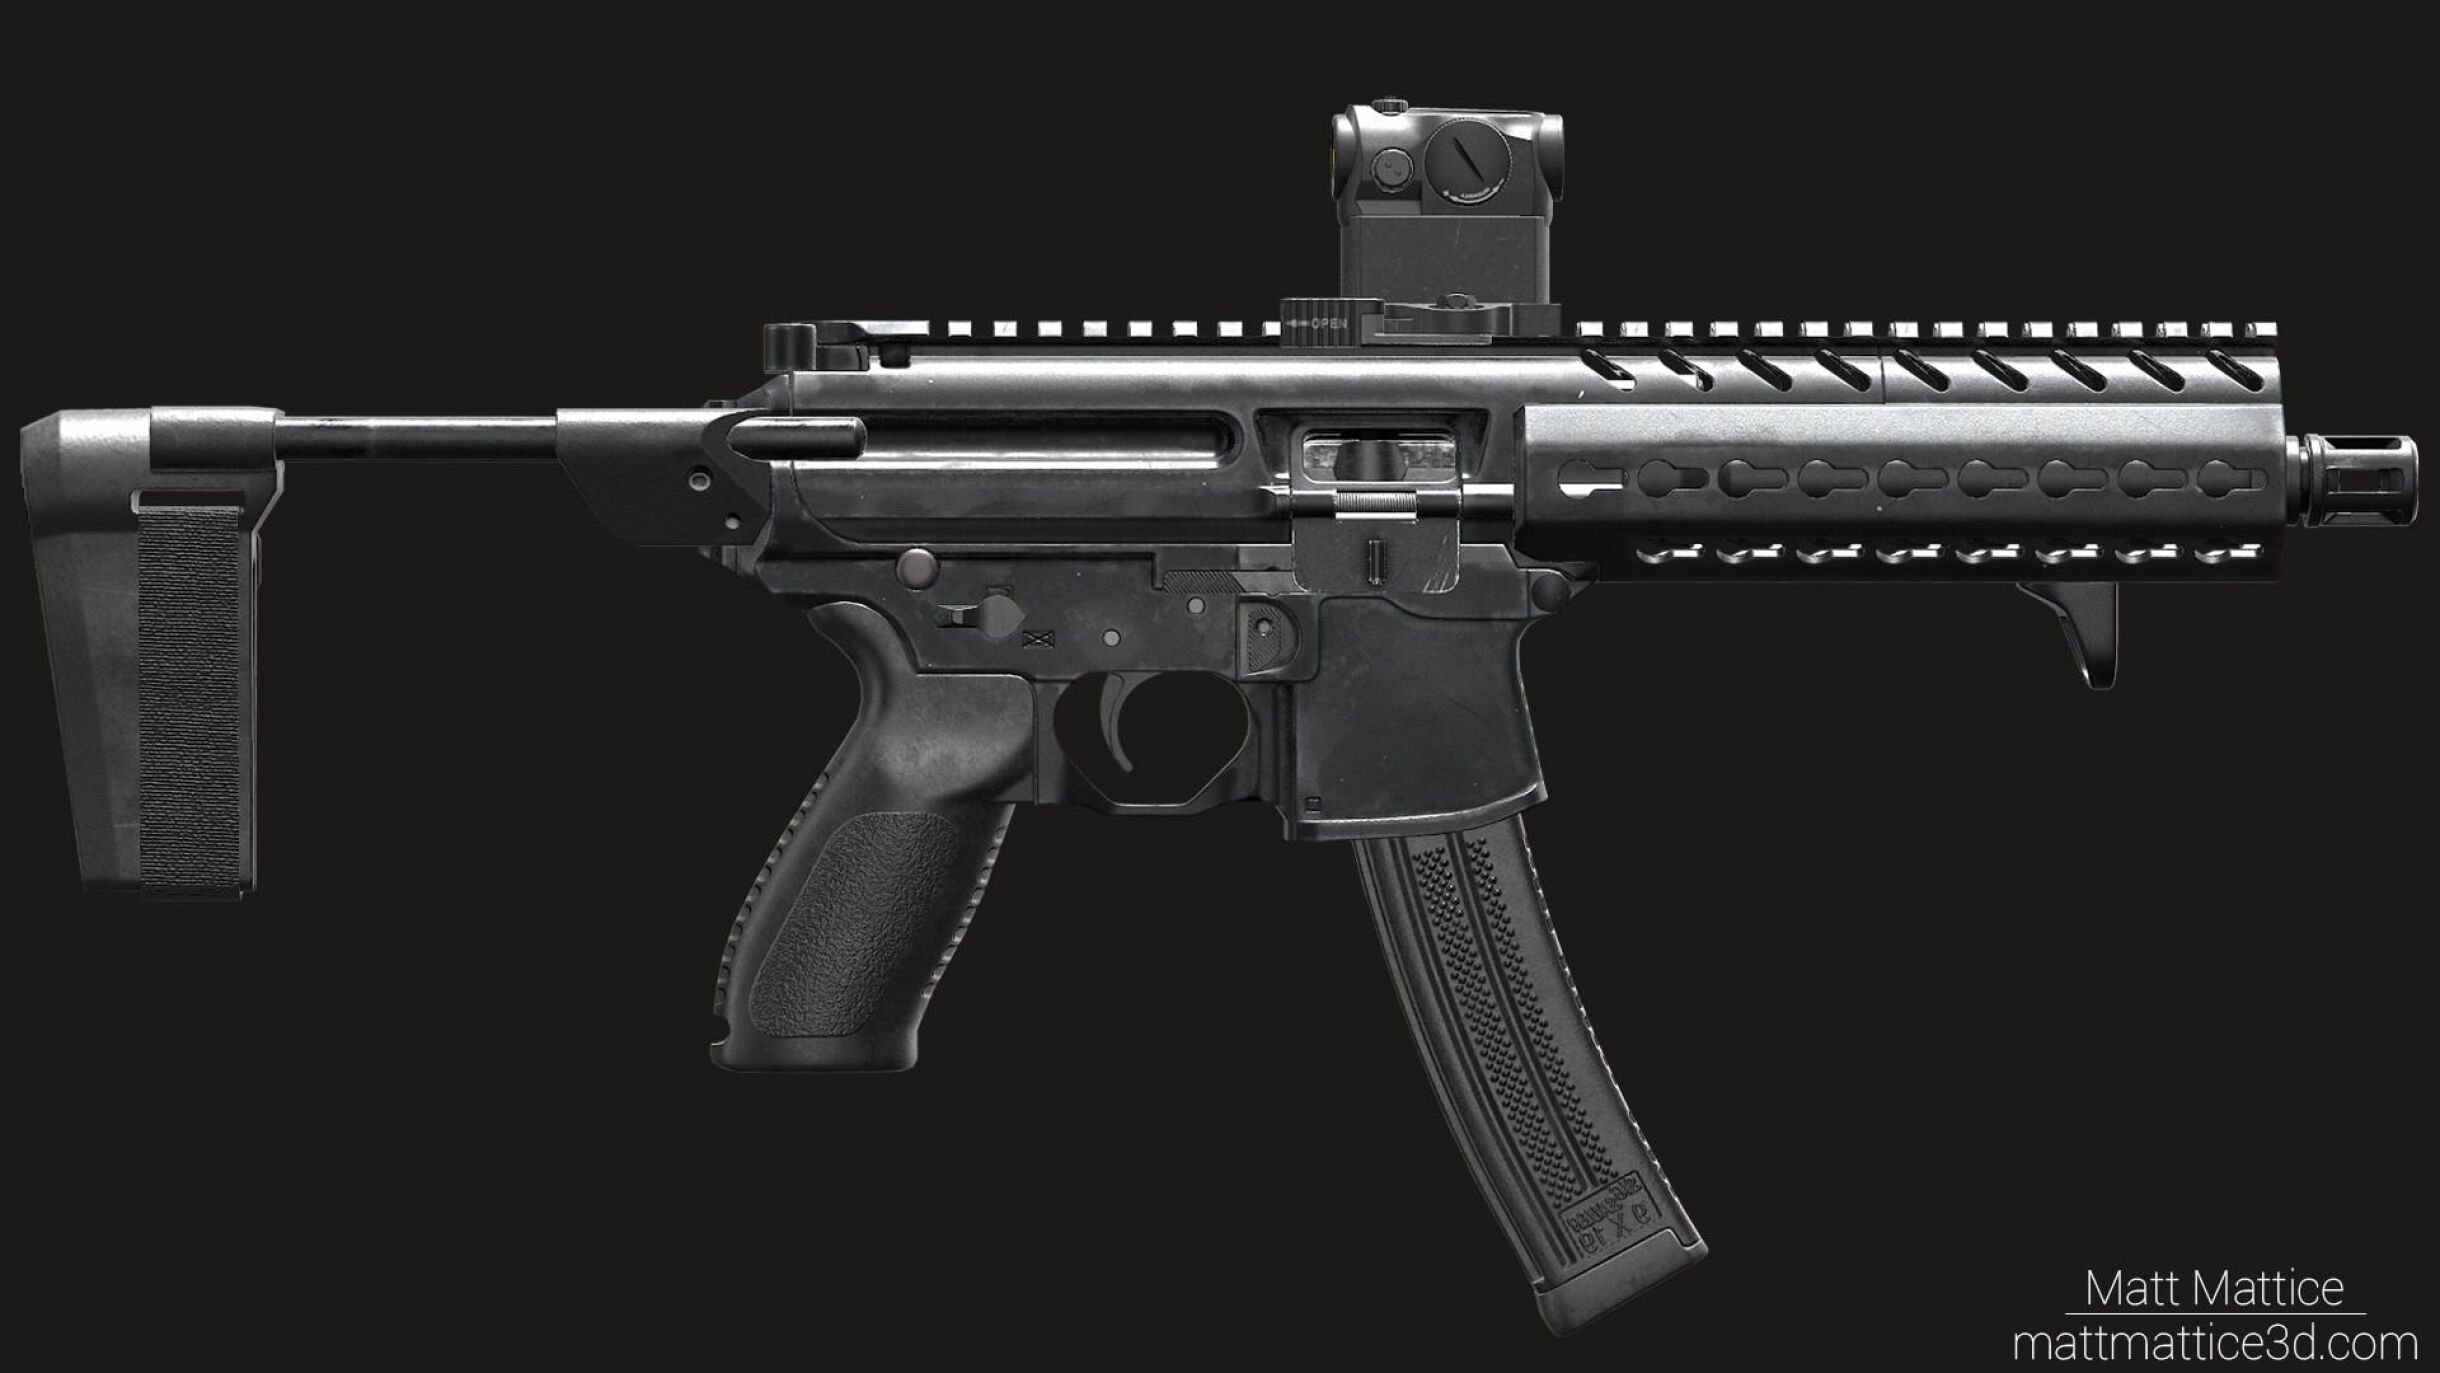
I also wanted to learn more about Ethan’s texturing process. Ethan tends to texture his guns very meticulously, finding reference images of the real weapon, and duplicating grease spots, stains, worn metal areas, making them seem real. By replicating his process, I was able to achieve what I would consider a successful final texture for my SIG MPX and Aimpoint Micro.
Modeling
For the CGMA course the modeling workflow was as follows:
1. CREATE A BLOCKOUT OF THE OBJECT.
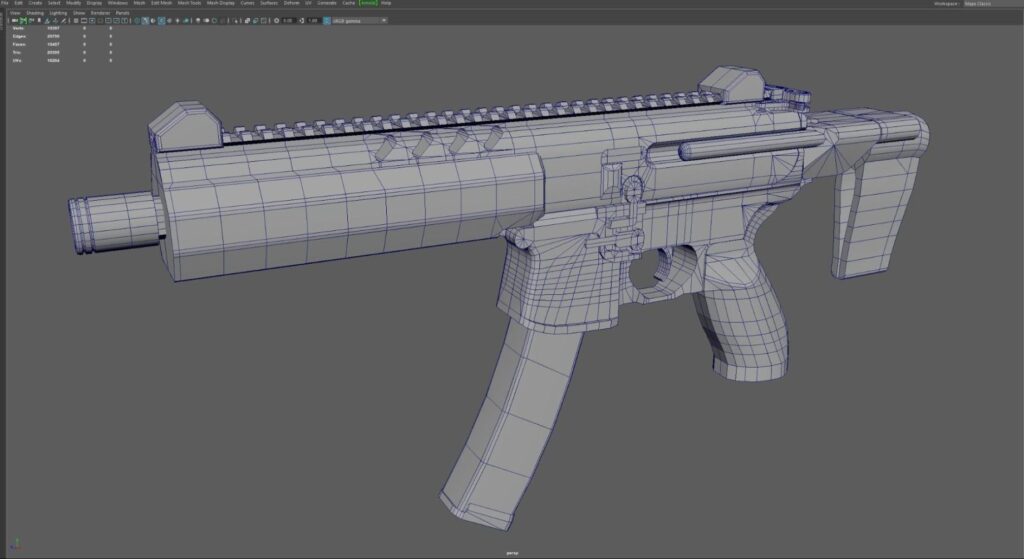
This blockout doesn’t necessarily mean creating basic polygon primitives and throw them together to form a gun. It was more of what I would consider an almost-low poly model, except your geometry doesn’t necessarily need to be clean, and it doesn’t need to be UV’d. If a blockout is done successfully, the “low poly” phase of the project should be very quick. Ethan explained to the class that getting a blockout done for a game like Call of Duty (or other First Person Shooters) is important so that it can be thrown into earlier stages of the game to see how it will appear and to make sure that the proportions are looking good. The blockout phase was completed in Maya.
2. CREATE A HIGH POLY OBJECT.
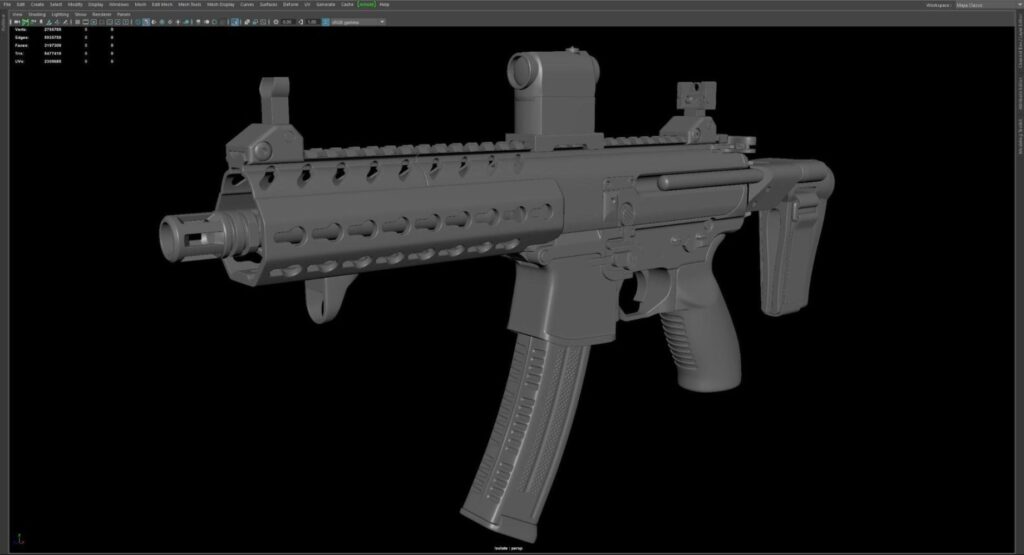
The blockout can also help guide your high poly if done well enough. Everything in the high poly model should be subdivided, and there should be no pinching. I used a combination of Zbrush, and Maya to achieve my high poly. The dynamesh boolean method in Zbrush really helps to alleviate pinching that occurs often when pushing polygons in a standard modeling package. Using Zbrush to create high poly geometry is much faster than tweaking vertices or using Boolean operations in Maya, and this really helped to speed up the modeling process. It is also important that your high poly model has soft edges. Although soft edges on a hard surface object are not necessarily realistic, they certainly help make everything look good in the baking process.
3. CREATE THE LOW POLY MODEL.
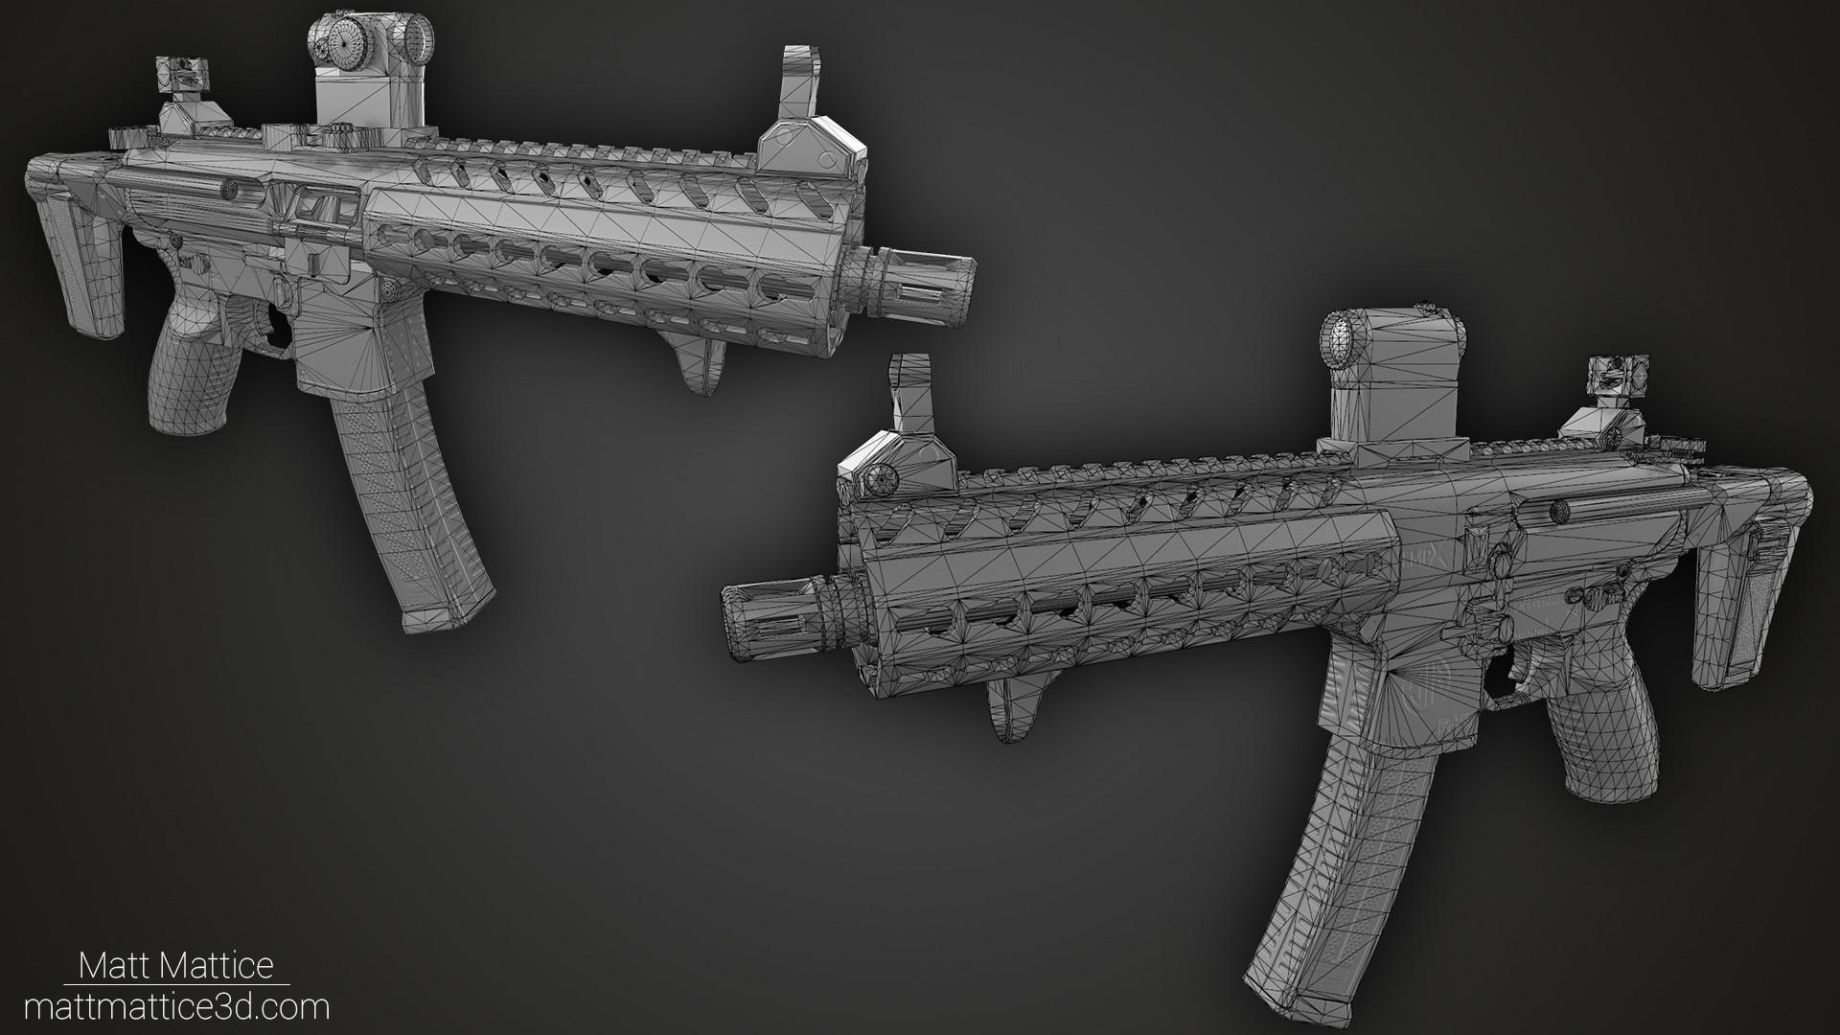
As mentioned previously, if done well enough, the blockout model will serve as a decent low poly model. My blocked out SIG MPX had a few areas where the geometry was a bit messy, so I went through and cleaned everything up. I also added things to my low poly that I may have forgotten to put into the blocked out SIG MPX, but had included in the high poly. I was paying close attention to the high poly model during this process, noting the detail that the normal map could capture, and taking out unnecessary geometry, as well as making sure the low poly geometry lined up with the shape and form of the high poly.
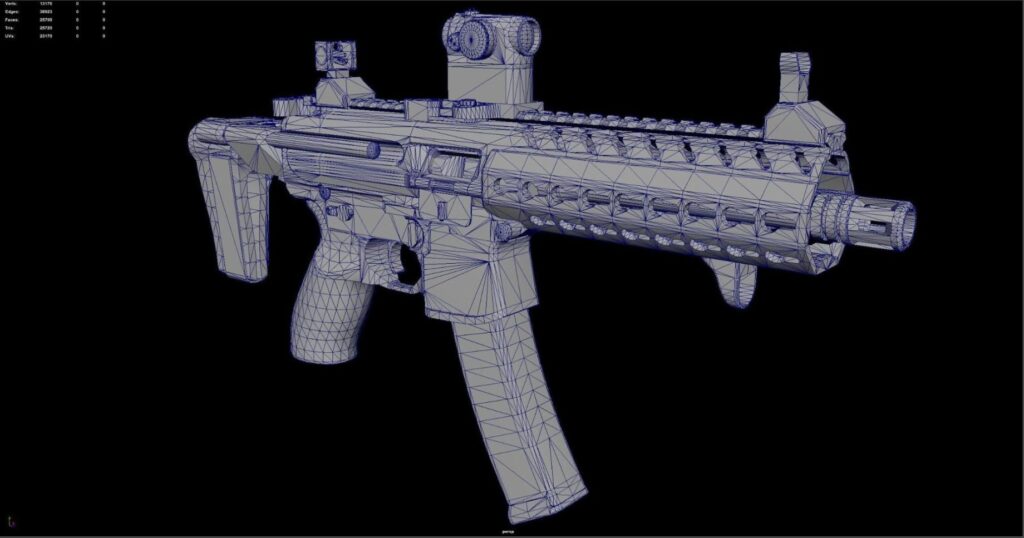
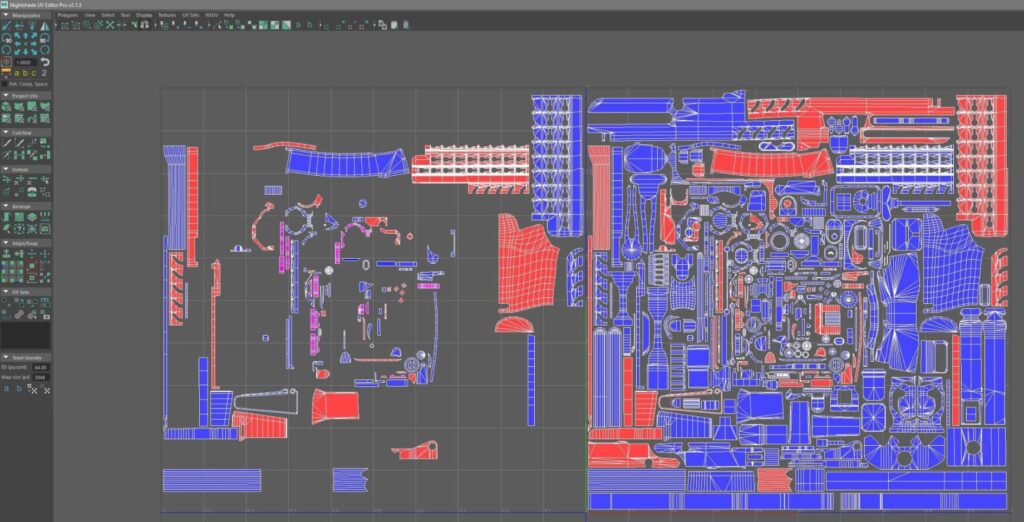
After the creation of the low poly, the UV’ing process begins. Ethan showed us this great plugin for Maya called Nightshade UV Editor. Nightshade UV editor functions very similar to Maya’s default UV editor, but it comes with more tools that make it easier to perform tasks that would otherwise be difficult or tedious, such as: stacking UV shells or snapping UV points to other UV points. Ethan also showed us how important it was to stack UV shells. By stacking mirroring UV shells, you can fit more in the 0-1 space, and ultimately get more out of your textures.
Texturing
After creating UV’s, it was time to start baking. I baked everything (Aimpoint Micro, Iron Sights, Glass) except for the SIG MPX inside of Marmoset Toolbag 3. I had to use Substance Painter’s baker when I encountered some problems with the cage that MT3 generated for me on the part of the upper receiver that has diagonally cut holes for ventilation. I would have preferred to bake the entire project in MT3, because you have a lot of control over individual cages that are generated within the program, and it is a fast baker.
I approached the texturing on the SIG MPX much like I do with my other projects: one piece of the model at a time. I try to stay as organized as possible when working in Substance Painter, because it is easy to pile on the layers and get lost in your own project, just experimenting and seeing what might look good on the model. I usually start by creating folders for each part of the model. For example, I have folders for the upper receiver, lower receiver, magazine, pistol grip, etc. Since I separate everything out into different folders, my layer stack becomes very large, but as long as everything is labeled properly it is easy to find something if I need to go back.
Most of the SIG MPX is a metal material that I created inside of Substance Painter and turned it into a Smart Material so that I could use it later in the project. This smart material consists of three layers of different procedural noises, and varying roughness values to create what is supposed to look like a gritty/bumpy black metal that is seen on a lot of guns.
The plastic that appears on the magazine of the SIG MPX is supposed to be a polymer that is also commonly seen in guns. It has a bit of procedural white noise in the height channel, to give it a “bumpy” look, and the roughness was adjusted so that it wasn’t too shiny.
For the pistol grip and stock materials, I started with a base color that was close to a dark gray. After that, I created three roughness layers in which I used a procedural noise in the roughness channel. Each layer’s roughness channels “opacity” in the layer stack was adjusted so that the material had a nice blend of scratches, and wear and tear, but most importantly, it looked like the weapon had been handled.
The approach that I took to creating the rubber material is usually how I go about creating a material inside of Substance Painter. I just start throwing procedurals in different channels, lower opacities and find something that gives me a good result.
For the logos and all of the text on the gun, Ethan recommended that we create decal sheets in Photoshop. I obtained various logos and text by either Googling for logos or images, tracing and remaking logos, and retyping text with a font that looked similar to that which is on the real weapon. All of this was done on a few square images (2048×2048) with black backgrounds and imported into Substance Painter as alphas. Once imported, I was able to use the stencil tool to paint various text and logos onto the SIG MPX. On any text that had height information, I added a blur filter to the layer so that the text didn’t look like it was stamped so harshly into the material.
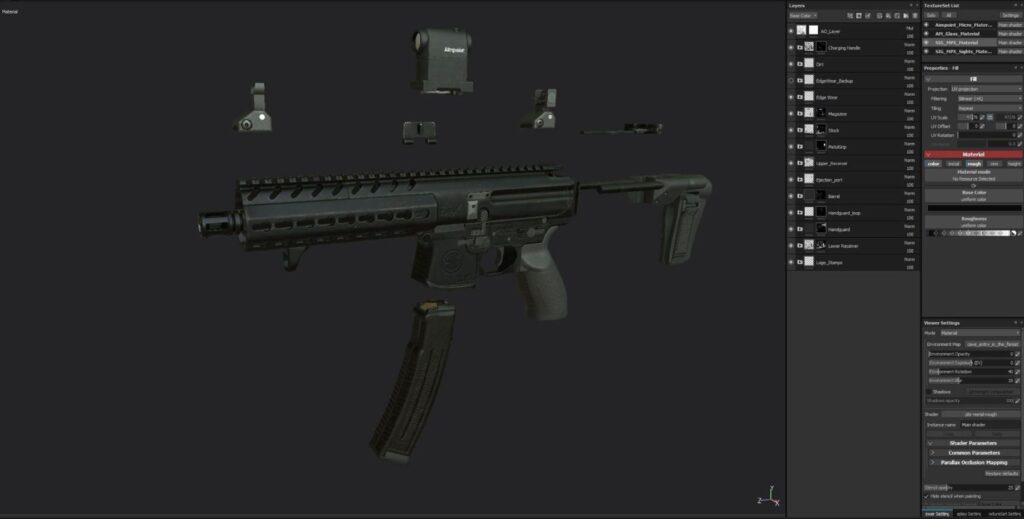
Creating textures for weapons is pretty similar to creating textures for other props. Since this class focused on creating a gun and attachment that would be seen in a first-person shooter, extra care went into making sure that the textures looked authentic to the real weapon and attachment. By looking at multiple reference images, I was able to see grease patterns or scratch patterns that occur on most SIG MPX’s and Aimpoint Micro’s and recreate those patterns in Substance Painter. Ethan suggested that it may also be beneficial to look at images of other (similar) weapons with similar metal materials. While looking at these other weapons, I noticed another common thing that occurs with most heavily used weapons: a lightening in color of the metal around the edges. In summary, use reference images!
Rendering
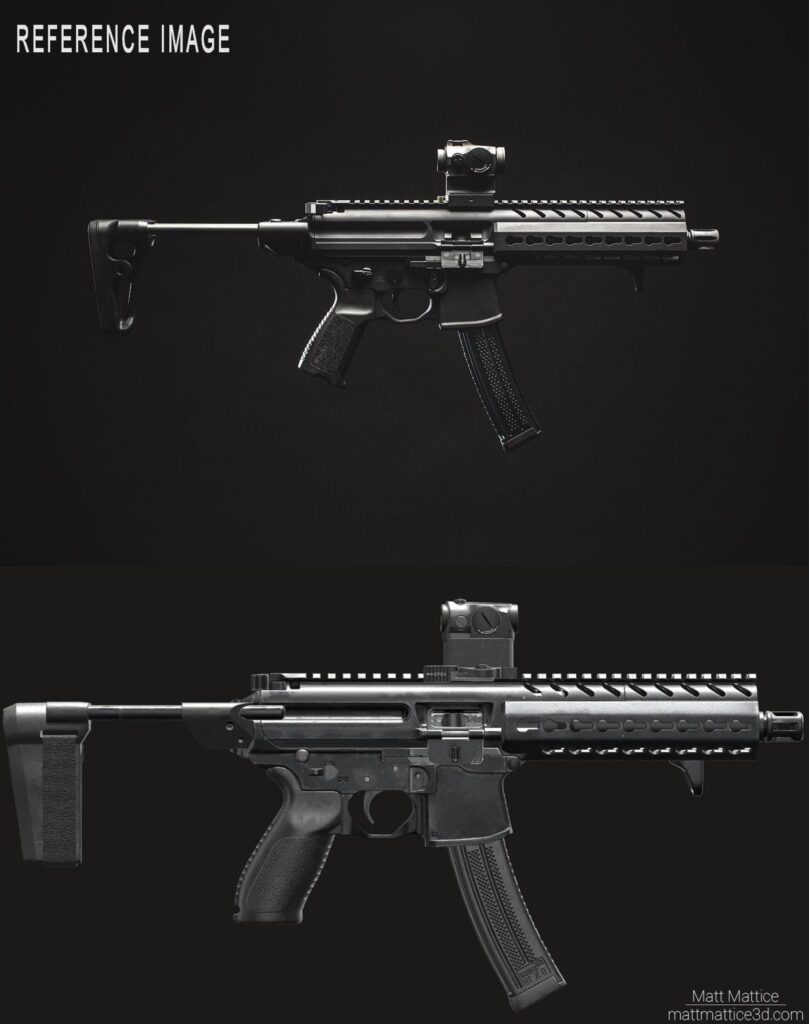
All of the rendering for this project took place in Marmoset Toolbag 3. When it comes to rendering, I used tips that Tim Bergholz gives in his “Ultimate Hardsurface Weapon Tutorial”, without giving too much of the tutorial away, he likes to find real images of the weapons and recreate them. When creating what I would consider my best render, I found an image online to replicate. I had to adjust the “field of view” of the camera to make the SIG MPX look flattened, almost like an orthographic view. After adjusting the camera settings, I added “sky lights” in the scene by clicking inside of the panorama background image. With each of these lights, you can adjust brightness settings, as well as turning shadows on or off. After experimenting, I rendered the SIG MPX with transparency checked and threw it into Photoshop to add a background similar to what the original image had.
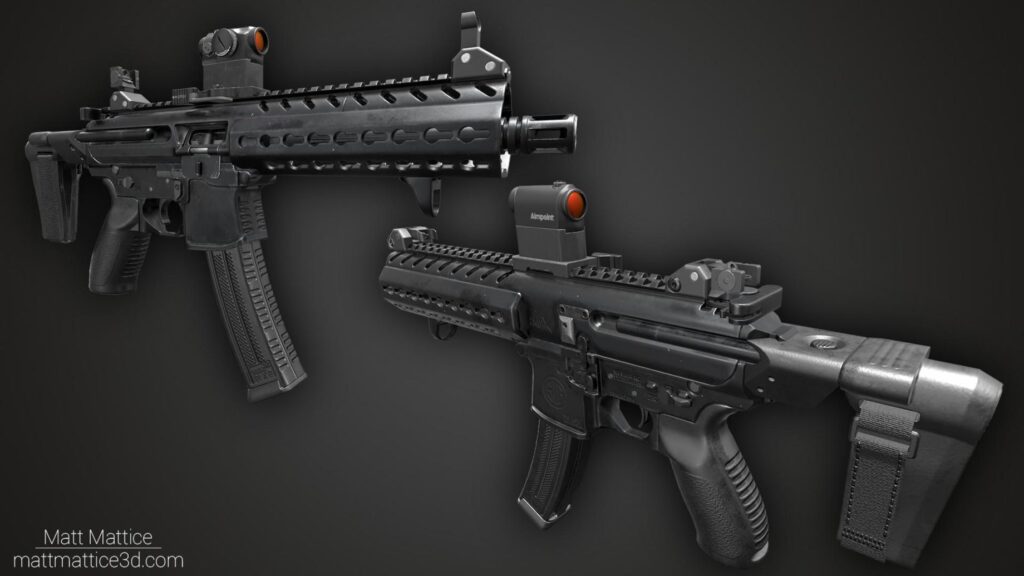
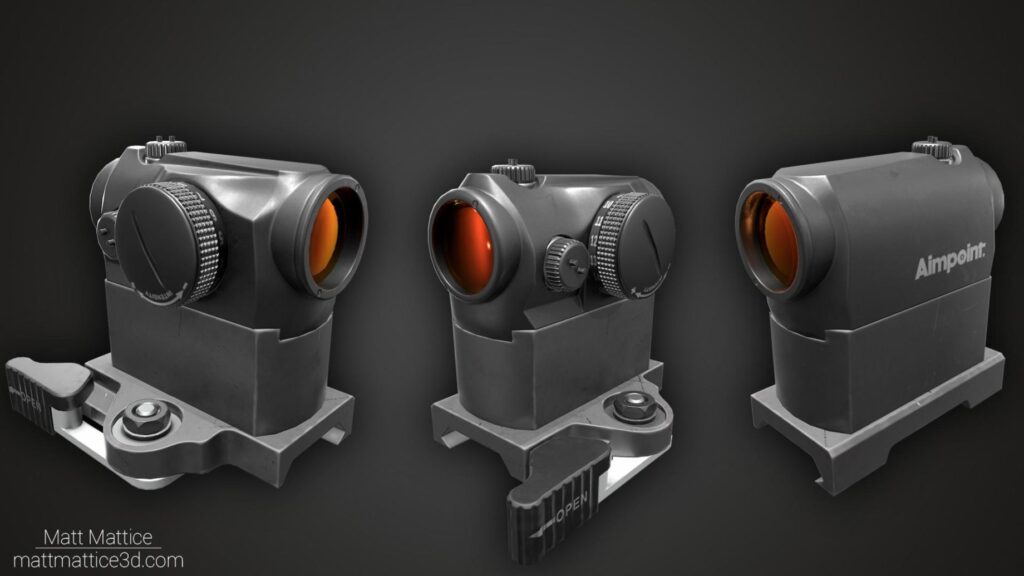
For the rest of the renders, I just moved the SIG MPX around, hiding and unhiding the Aimpoint Micro, and the iron sights to achieve shots of multiple angles of the weapon and prop, in multiple usable “modes” as if it were in a first-person shooter (i.e. sights down or up, Aimpoint Micro attached or detached). Each of these renders was also taken with transparency checked, thrown into Photoshop, and given a dark shadowy silhouette to help show the shape of the object. Finally, a black to gray gradient background was given to each render. The post-processing ideas for these renders came from Ethan Hiley’s weapon renders. Most of his renders have the shadow around the weapon, and I really liked the look of the final products, so I did my best to recreate them.
After completing the intense six-week course “Weapons and Props for Games” taught by Ethan Hiley, I can easily say that I have learned quite a few new techniques that I will continue to use in future projects. I would highly recommend this class to anyone that wants to learn more about AAA weapon development. The final triangle count, as well as the maps generated for the SIG MPX are as follows:
Triangles:
- SIG MPX: 20,422
- Flip Up Sights: 1,842
- Aimpoint Micro: 3,456
Maps:
- SIG MPX: 1X2048
- Flip Up Sights: 1×1024
- Aimpoint Micro: 1×1024
- AM Glass- 1×256
